Lesson 7: Sprites
Game Lab
Overview
Question of the Day: How can we use sprites to help us keep track of lots of information in our programs?
In order to create more interesting and detailed images, students are introduced to the sprite object. The lesson starts with a discussion of the various information that programs must keep track of, then presents sprites as a way to keep track of that information. Students then learn how to assign each sprite an image, which will greatly increase the complexity of what they can draw on the screen.
Purpose
Keeping track of many shapes and the different variables that control aspects of those shapes can get very complex. There will be lots of variables with different variable names. Instead, computer scientists created something called an object which allows for one variable name to control both the shape and all its aspects. In Game Lab we use a certain type of object called a sprite. A sprite is just a rectangle with properties for controlling its look. Properties are the variables that are attached to a sprite. You can access them through dot notation.
Using the Animation Tab, students can create or import images to be used with their sprites. Later on, these sprites will become a useful tool for creating animations, as their properties can be changed and updated throughout the course of a program.
Assessment Opportunities
-
Create and use a sprite
See levels 12 and 17 on Code Studio.
-
Use dot notation to update a sprite's properties
See level 17 on Code Studio.
Agenda
Lesson Modifications
Warm Up (5 min)
Activity (40 min)
Wrap Up (5 min)
View on Code Studio
Objectives
Students will be able to:
- Create and use a sprite
Preparation
- (Optional) Print a copy of the activity guide for each student
Links
Heads Up! Please make a copy of any documents you plan to share with students.
For the Teachers
- Sprites - Slides
Vocabulary
- Dot notation - the way that sprites' properties are used in Game Lab, by connecting the sprite and property with a dot.
- Property - A label for a characteristic of a sprite, such as its location and appearance
- Sprite - A character on the screen with properties that describe its location, movement, and look.
Introduced Code
Teaching Guide
Lesson Modifications
 Attention, teachers! If you are teaching virtually or in a socially-distanced classroom, please see these modifications for Unit 3.
Warm Up (5 min)
Discussion Goal
The goal here is to get students thinking about all of the different values that go into drawing a single shape on the screen, and how many more values they may need to control a more detailed character in a program. If students are struggling to come up with ideas, you might use some of the following prompts: How do you tell a shape where to go on the screen? How do you tell a shape what size it needs to be? How do you tell a shape what color it should be? What about its outline? What if you wanted to change any of those values during your program, or control other things like rotation?
How Much Information?
Review: So far we've written programs that put simple shapes on the screen. List of all of the different pieces of information that you have used to control how these shapes are drawn.
Prompt:If you wanted to create programs with more detailed images, maybe even characters that you could interact with, what other pieces of information might you need in your code?
Share: Allow students to share out their lists.
Remarks
Today we'll learn how to create characters in our animations called sprites. These sprites will help us keep track of all of the information that we need in our programs.
Question of the Day: How can we use sprites to help us keep track of lots of information in our programs?
Activity (40 min)
Introduction to Sprites
Transition: Send students to Code Studio
Wrap Up (5 min)
Key Vocabulary:
- Sprite - A character on the screen with properties that describe its location, movement, and look.
- Property - A label for a characteristic of a sprite, such as its location and appearance.
- Dot Notation - the way that sprites' properties are used in Game Lab, by connecting the sprite and property with a dot.
Discussion Goal
This discussion prompts students to think about the different properties that a sprite might have, and prepares them for the next lesson, which explicitly covers sprite properties.
Journal
Question of the Day: How can we use sprites to help us keep track of lots of information in our programs?
Prompt: So far we've been able to change a sprite's location and image. What else might you want to change about your sprites?
- Lesson Overview
- 1
- Exploration
- 2
Student Instructions
Exploring Sprites
This program uses some new blocks that you haven't seen before.
Do This
With your partner, read the code and discuss how you think it works. Change some lines and see what happens. What do you think each line is doing?
- Video: Introduction to Sprites
- 3
Teaching Tip
Discussion Goals
Key Vocabulary:
- Sprite - A character on the screen with properties that describe its location, movement, and look.
- Property - A label for a characteristic of a sprite, such as its location and appearance.
- Dot Notation - the way that sprites' properties are used in Game Lab, by connecting the sprite and property with a dot.
Sprites are a very complex concept, and students may have difficulty understanding exactly what they are. The most important aspect for students to understand is that sprites allow them to organize a lot of information about something that they want to draw to the screen.
Students should make the connection between properties and variables, that both hold information that their program needs to run. Properties are accessed through their sprites, and Game Lab sprites already have specific properties that are automatically created when students create each sprite, such as x position, height, and rotation.
Sprites solve the problem of organizing a lot of information about how something should be drawn to a screen. Rather than creating new variables to hold all of that information, sprites use properties to hold all of the information about one thing that is drawn to the screen.
Content Corner: The sprite is a type of data called an object. While we aren't yet explicitly introducing the concept of objects, students do need to understand that a sprite is a different type of value from the ones we've seen before, one that can hold references to many more values.
Student Instructions
Questions to Consider
- What is a sprite?
- What are properties?
- What problem do sprites solve?
Student Instructions
Sprites
Creating Sprites:  creates a new sprite and assigns it to a variable. The default name is
 sprite, so you'll want to change it to something more meaningful.
Drawing Sprites: Sprites only appear on the screen when you draw them there. Calling  will draw all of your created sprites on the screen.

Do This
This program includes comments that let you know where to place code but otherwise is blank. Your program should look like the image on the right.
- Add
var sprite = createSprite(200, 200)under the commentCreating Sprites.- You can ignore the yellow triangle warning for now. It's just telling you that you haven't used your sprite yet.
- Add
drawSprites()under the commentDrawing. - Run the code to draw your first sprite on the screen.
Hint: Sprites are drawn from their center, which means that center of the square (not the top left corner) is at (200, 200).
Student Instructions

Debug
This program should create two new sprites, one on the left of the screen and one on the right, but it's only drawing one. You don't need to add any code, just rearrange the code already present to make sure that both sprites show up like the picture on the right.
Student Instructions
Adding Animations
This program draws four sprites to the screen, and one of them has an animation from the Animation Tab!
Do This
- Run the code to see what happens.
- Look in the Animation Tab to see what animations are available to you Show me where
- Feel free to alter your animations or choose a new one.
- Use the
setAnimationcommand to change the look of your other sprites.
- Video: The Animation Tab
- 7
Teaching Tip
Discussion Goals
Make sure students understand that they will need to both create the image (or animation) in the Animation Tab and then add the animation to the sprite using the setAnimation block. Students may be confused by the use of the word "animation" for single images, but in Game Lab, still images are considered "animations" with only one frame.
Students can use an animation already in the animation tab library, upload one from their computer, or create their own using the provided drawing tools. Additionally, students can use the drawing tools to modify the images they have chosen from the library or uploaded.
Misconception Alert!
Many students may now confuse the concepts of a sprite, its animation, and the image that it draws to the screen. In the next few lessons, watch out for this misconception, and reinforce the idea that a sprite's animation is just one of its properties, the one that controls what image is drawn to the screen. Remind students that a single sprite may have different animations throughout the course of the program, just as other properties can change, and that two or more sprites might share the same animation.
Student Instructions
Questions to Consider
- What are the steps to adding an image to a sprite?
- What are the different ways to get an image?
Student Instructions
Debug some sprites

This program draws three sprites to the screen, but it's not working yet. The wrong sprite is in front, and one sprite's animation isn't showing up.
Do This
- Run the code to see what happens.
- Fix the two problems in the code.
Hint: Just like shapes, sprites are drawn in the order they are created.
Student Instructions
Student Instructions
Use your new sprite and animation skills to complete these levels.
Choose from the following activities:

The sprites are being created, but you need to change the code to make the sprites appear

Fix the names of the animations so that the errors go away

Fix the sprite name so that all three cherries appear

Change the code so that we can see the ladybug and the snail

Get creative and make a fish scene :)
Create your own scene using both drawing and sprites
Student Instructions
Debug: Missing Sprites
Looking at the code below, we can see that many sprites are created, and yet when we run the program, nothing shows up. Can you fix it?
Student Instructions
Debug: Sprites Animation Error
Errors are being hit whenever we try to run our program! It looks like something is wrong with our animations, can you try and fix it?
Student Instructions
Debug: Sprite Name
The program below is trying to draw the same sprite in three different positions, but only one of them is showing up. What's happening here and can you fix it?
Student Instructions

Debug: Sprite Order
Something is wrong with the scene below. Some sprites are behind other sprites when they should be in front of them. Can you fix it?
Student Instructions
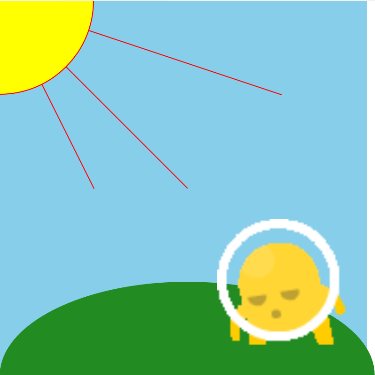
Create A Scene
We've started you off with three different fish sprites. Using anything else that you want like drawings or other sprites, customize the fish sprites to make a fun looking scene!
Student Instructions
Combine Ideas
You have now learned how to draw images as well as create sprites in GameLab now. So using both of these techniques, create a fun scene!
- Assessment
- 11
Student Instructions
Create your own sprites

Use what you've learned to create your own sprites. The example is just one way to complete the level. Decide for yourself what you want your sprites to look like.
Do This
- Go to the animation tab and add at least two animations to your project.
- In the code tab, create at least two sprites in two different places on the screen.
- Assign each sprite a different animation.
- Draw your sprites to the screen.
Student Instructions
Try these extra challenges that will help you make your sprites even more special.
Choose from the following activities:
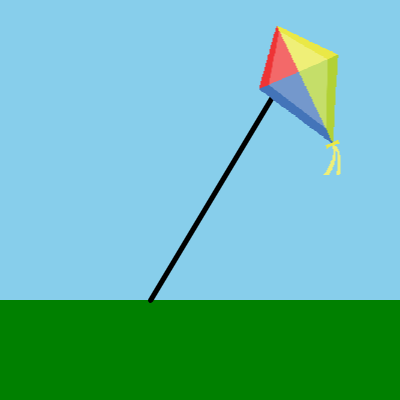
Upload an image from another website to complete a kite scene.
Create a sprite animation from scratch.
None
Teaching Tip
Recommended Search Engines
Because we can't know which sites might be blocked in your district, we've avoided pointing students to a specific search engine. Not all search engines make it easy to set Creative Commons filters - some of the easiest include:
Student Instructions
Uploading Images
You can also use the Animation tab to upload! You are going to make a flying kite. You can search the web for an image.
Do This
- Search online for an image of a kite. Small images with transparent backgrounds work best.
- Download your kite image.
- Open the animations tab.
- Click
 and then
  to upload an image.
 - Select the file from your computer.
- Rename your image so it is easy to remember. To rename it click the text below the image.
- Back in code mode, use
sprite.setAnimation()to make yourkitesprite show your new animation.
Don't worry if your kite image is too big! You'll learn how to fix that in the next level.
Student Instructions
Drawing your own image
You can also use the Animation tab to draw your own image. You are going to make your own character by drawing it.
Do This
- Open the animations tab.
- Click and then
 to draw your own picture to use as a sprite.
 - Rename your picture so it is easy to remember. To rename it click the text below the picture.
- Back in code mode, use
sprite.setAnimation()to make your character sprite show your new animation.
For now, don't worry if your character picture is too big or small. You'll learn how to resize sprites in the next lesson.
Teaching Tip
Recommended Search Engines
Because we can't know which sites might be blocked in your district, we've avoided pointing students to a specific search engine. Not all search engines make it easy to set Creative Commons filters - some of the easiest include:
Student Instructions
Combine Ideas
It's time to combine all the different ways to create sprites and have fun!
Do This
Using the sprites we give you or by uploading images or drawing your own sprites, create a fun scene with different kinds of sprites! Be creative!
Standards Alignment
View full course alignment
CSTA K-12 Computer Science Standards (2017)
AP - Algorithms & Programming
- 2-AP-11 - Create clearly named variables that represent different data types and perform operations on their values.
- 2-AP-13 - Decompose problems and subproblems into parts to facilitate the design, implementation, and review of programs.
- 2-AP-16 - Incorporate existing code, media, and libraries into original programs, and give attribution.
- 2-AP-17 - Systematically test and refine programs using a range of test cases.
- 2-AP-19 - Document programs in order to make them easier to follow, test, and debug.