Lesson 25: The Game Design Process
Overview
Question of the Day: How does having a plan help to make a large project easier?
This lesson introduces students to the process they will use to design games for the remainder of the unit. This process is centered around a project guide which asks students to define their sprites, variables, and functions before they begin programming their game. In this lesson students begin by playing a game on Game Lab where the code is hidden. They discuss what they think the sprites, variables, and functions would need to be to make the game. They are then given a completed project guide which shows one way to implement the game. Students are then walked through this process through a series of levels. At the end of the lesson, students have an opportunity to make improvements to the game to make it their own.
Purpose
This lesson introduces multi-frame animations, and is the first in a sequence centered around the process of building software.
While previous lessons focused on using abstractions to manage the complexity of the code, this lesson focuses on managing the complexity of the software development process. The lesson heavily scaffolds the software development process by providing students a completed project guide, providing starter code, and walking students through its implementation. In the subsequent lessons students will need to complete a greater portion of this guide independently, and for the final project they will follow this process largely independently.
Assessment Opportunities
-
Implement different features of a program by following a structured project guide
In the Wrap Up discussion, make sure students are clear on how the project guide helps them to break their programming work into manageable chunks, and that they understand how listing the sprites and functions ahead of time can help them focus on specific bits of code rather than the entire program at once.
Agenda
Lesson Modifications
Warm Up (15 min)
Activity (60 min)
Wrap Up (5 min)
View on Code Studio
Objectives
Students will be able to:
- Implement different features of a program by following a structured project guide
Preparation
- Print copies of the the project guide if you will be giving students physical copies. Please note that this project guide is intentionally filled out. (See notes in Lesson Plan.)
Links
Heads Up! Please make a copy of any documents you plan to share with students.
For the Teachers
- The Game Design Process - Slides
For the Students
- Defender Game - Project Guide (Filled Out)
Teaching Guide
Lesson Modifications
 Attention, teachers! If you are teaching virtually or in a socially-distanced classroom, please see these modifications for Unit 3.
Warm Up (15 min)
Play Cake Defender
Transition: This lesson begins immediately in Code Studio. On the first level, students will find a game but will not be able to see the code. They should play the game and follow the instructions which ask them to list the variables, sprites, and functions they think are necessary to create this game.
Stop: Review Project Guide
Discussion Goal
Running the Conversation: You can write "Variables", "Sprites", and "Functions" on the board and record their ideas below each. Ask students to justify their decisions but don't feel the need to settle on one right answer.
Discuss: Students should have individually created a list of variables, sprites, and functions they would create to make the defender game they played. Ask students to share their lists with a neighbor before discussing as a class.
Remarks
There's usually lots of ways you can structure a program to get it to work the way you want. The important thing when writing complex or large programs is that you start with a plan, including the sprites, variables, and functions you will want in your program. Today we're going to look at how we could implement this plan to build our own defender game. By the end of the lesson you'll not only have built your game, but you'll know how to change it and make it your own. Let's get going!
Question of the Day: How does having a plan help to make a large project easier?
Activity (60 min)
Teaching Tip
Project Guide: The project guide is intentionally filled out for students so that they can experience using it as a reference when programming. This should give them more context when filling out their own project guide in the next two lessons.
You can give each student their own copy for reference, but you might also choose to print one copy per pair, share digital copies, or just display the guide on the projector. So long as it is available for reference, any approach will work fine.
Distribute: Give each student or pair of students a copy of the project guide.
Prompt: Compare the components of the game you thought would be included to the ones on this project guide. Do you notice any differences?
Discuss: As a class compare the list you made on the board to the list of variables, sprites, and functions on the project guide. Note the similarities. Where there are differences try to understand why. Don't approach one set as "right" vs. "wrong" but just confirm both would be able to make the game students played.
Implement Project Guide
Students are given a large amount of starter code in this project. The sprites, variables, and functions have all already been given to them. The work of this project is writing the code for the individual functions. These levels guide students through how to implement those functions. As students move through the levels point out how the project guide is being used.
The most challenging skill students use in these levels is recognizing the need to create new functions to replace repeated code. Students need to build this skill on their own but these levels demonstrate an instance where this might happen.
Wrap Up (5 min)
Assessment Opportunity
As students answer the questions, make sure that they understand that the project guide is there to help them organize their work, so that they can look at smaller parts of the problem rather than thinking about it all at one time. They can use it to focus on one part of their program at a time as they code.
In the next lesson, as they fill out their own project guides, they will need to think carefully about the different parts of their program before they start coding. You may want to remind then of the "Prepare" part of the Problem Solving Process, and to think about how they might need to go back and tweak the project guide even after they have started coding.
Using the Project Guide
Prompt: Today, you used a filled-out project guide as you completed your program.
- How did the project guide help you as you coded?
- What do you think will be important to remember when you fill out your own project guide?
- Lesson Overview
- 1
- Same Game
- 2
Student Instructions
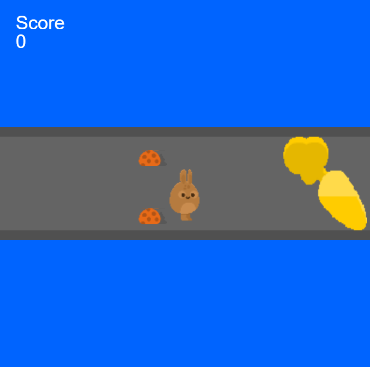
Defend Your Cake!
This is an example of a defender game that you'll build by the end of this lesson. To defend your cake, move the alien with arrow keys to block the lady bugs and push them into the water.
Do This
Turn to a classmate and make a list of the following information.
If you were making this program…
- What sprites would you need?
- What variables would you need?
- What functions would you use?
- Plan Your Project
- 3
Student Instructions
Plan Your Project
Take a look at the project guide, which has already been filled out for you.
- Does the project guide describe the same sprites that you thought of?
- Does it use the same variables to store information?
- Are the functions that it describes the same as the functions you described?
Student Instructions
Getting Started: Set Animations
Before you get started, you'll want some better animations for each of your sprites.
Do This
- In the Animation Tab are animations for each of your sprites. Go look at what they are.
- In your code give each sprite its appropriate animation. Use the ones provided for now but later you'll be able to go change them.
Student Instructions
Moving The Enemies
You'll need to get your enemy sprites to a random position and moving across the screen.
Do This
- After each enemy sprite is created...
- Set its x position to 0.
- Set its y position to be a random number between 150 and 250.
- Set its x velocity to 2.
- Test your program. Your enemy sprites should now be moving across the bridge.
Student Instructions
Moving Left and Right
Now you'll just need to get your character moving left and right and changing its animations.
Do This
- Inside the
movePlayerfunction... - Use a conditional to detect when the "right" arrow is pressed.
- If it is, move the player sprite to the right by 3.
- Use another conditional to move the player to the left when the "left" arrow is pressed.
- Test your game. Your character sprite should now move left and right when you press the left and right arrows.
Student Instructions
Moving Up and Down
You'll want your player sprite to move up and down as well.
Do This
- Inside the
movePlayerfunction... - Use a conditional to detect when the "up" arrow is pressed.
- If it is, move the player sprite up by 3.
- Use another conditional to move the player down when the "down" arrow is pressed.
- Test your code. Your character should now move in all four directions.
Student Instructions
Change Player Animations
You can change the animation when the player changes direction.
Do This
- Inside the Animation Tab copy the animation of your player sprite.
- Flip each frame of the new animation so that the sprite is facing in the opposite direction.
- Rename your new animation.
- Inside the
movePlayerfunction, set the sprite's animation so that the player changes the direction it is facing when the "left" and "right" arrows are pressed.
Student Instructions
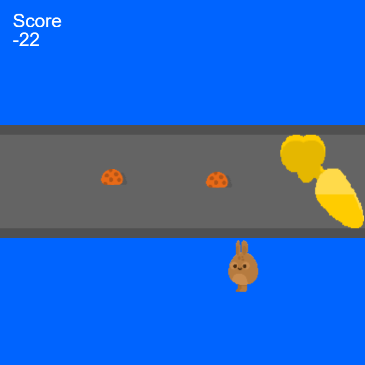
Touching the Cake
If the enemies get all the way across to the cake you should place them back at the left side of the screen and decrease the score. To start you'll write code for only one of your enemies.
Do This
- Inside the
enemiesTouchCakefunction, use a conditional to detect whether enemy1 has touched the cake. - If it has...
- "loop" the enemy back to the left side of the screen
- Set its y position to be a random number between 150 and 250.
- Use the counter pattern to decrease the score by 2.
- Test your code. One of your ladybugs should now reset when it gets across to the cake, and the score should go down by 2.
Student Instructions
Touching the Cake: Second Ladybug
Your first enemy sprite should now be resetting when it gets to the cake. Now you'll want the other ladybug to reset as well.
Do This
Inside the enemiesTouchCake function you should have written code that resets enemy1.
- Copy the entire if-statement you wrote in the last level (Ctrl-C).
- Paste the code inside of the
enemiesTouchCakefunction, just below the last one (Ctrl-V). - Change the name of the sprite in that code from
enemy1toenemy2.
Test your code. Now both bugs should reset when they touch the cake.
Student Instructions
Creating Functions

Your program now includes code in two places to set the enemies on the left side of the screen at a random y location. You can create functions to reset each of your two enemies to remove repetitions from your program. This will make your program easier to read, allow you to change it more easily, and allow you to quickly reset your sprites at other points in your program if you need to.
Do This

- At the bottom of your program create two new functions,
setEnemy1andsetEnemy2. - Inside each of these functions place the code that sets the enemies on the left side of the screen and gives them a random y position.
- Wherever the code for
setEnemy1andsetEnemy2appears in your program replace them with a call to the functions you just created.
Student Instructions
Displace Enemies
It's time to write code for some more sprite interactions. Your player sprite should displace the enemy sprites.
Do This
For this level you'll be writing code inside the displaceEnemies function.
- Write code that makes player displace both enemy sprites.
- Test your program to make sure your player is displacing enemies but they keep moving right after the player moves away.
Hint: You can use sprite.debug to see your sprites' colliders if you need to debug your program.
Student Instructions
Touching the Water
The last part of the game that you'll need to write is the code to reset the sprites when they touch the water. Luckily you should have already written functions that reset each sprite, so you'll just need a good way to know when either sprite leaves the bridge. Start by writing the code for a single enemy and then copy-paste and make small changes to create code for your second enemy.
Do This
For this level you'll be writing code inside the enemiesTouchWater function.
- Use an
ifstatement to check whether enemy1 is off the top of the bridge by checking whether its y value is below 140. Within your if statement:- use your
setEnemy1function to reset the sprite. - add 1 to the score.
- use your
- Use an if statement to check whether enemy1 is off the bottom of the bridge by checking whether its y value is above 260. Within your if statement:
- use your
setEnemy1function to reset the sprite. - add 1 to the score.
- use your
- Test your program for the first enemy sprite. Make sure the sprite is resetting and the score goes up.
- Once it is working copy and paste the code you wrote to create the same behavior for
enemy2. You'll need to change the name of the sprite and the name of the functions you use.
Student Instructions
Make It Your Own You just walked through someone else's plan for creating a game, so now it's time to make it your own. What additional features or challenges do you want to create?
Choose from the following activities:
Create a new background that shows up when players reaches a good score of your choosing
Randomize the speed of the enemies
Change the visuals of the game so that your player, enemies, or cake look different
End the game after three enemies have gotten to the cake.
Teaching Tip
This last level encourages students to make the game their own. If students have made their way to this point they have all the skills they need to progress through the curriculum, so there is no pressure to complete any of the modifications suggested in this level. If you have time, however, getting practice planning and implementing new features will be a useful skill. Even just modifying the animations of the game is an easy way students can make the game their own.
Student Instructions
High Score Background
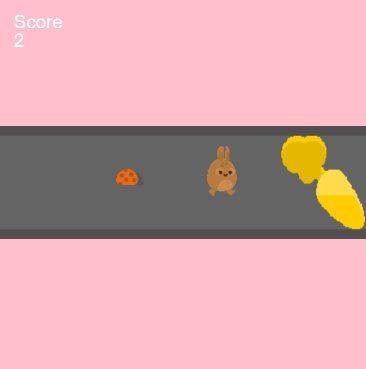
Create a new background that shows up when players reaches a good score of your choosing. (e.g. Turn the background pink when the player gets over 10 points)
Do This
- When drawing the background, add an if else statement to check if the score is above some number like 10
- Put the normal background in the else branch
- Draw a different background if the score is above that number
Teaching Tip
This last level encourages students to make the game their own. If students have made their way to this point they have all the skills they need to progress through the curriculum, so there is no pressure to complete any of the modifications suggested in this level. If you have time, however, getting practice planning and implementing new features will be a useful skill. Even just modifying the animations of the game is an easy way students can make the game their own.
Student Instructions
Randomize Enemy Speed
Use random numbers to make some enemies faster or slower
Do This
- Create two variables to store the speed of
enemy1andenemy2 - Set the velocity of the two enemies using the two speed variables
- When you create each enemy, generate a random speed
Teaching Tip
This last level encourages students to make the game their own. If students have made their way to this point they have all the skills they need to progress through the curriculum, so there is no pressure to complete any of the modifications suggested in this level. If you have time, however, getting practice planning and implementing new features will be a useful skill. Even just modifying the animations of the game is an easy way students can make the game their own.
Student Instructions
Change the Visuals
Change the visuals of the game so that your player, enemies, or cake look different.
Do This
- Change the player's sprite
- Change the enemy's sprite
- Change the cake's sprite
Teaching Tip
This last level encourages students to make the game their own. If students have made their way to this point they have all the skills they need to progress through the curriculum, so there is no pressure to complete any of the modifications suggested in this level. If you have time, however, getting practice planning and implementing new features will be a useful skill. Even just modifying the animations of the game is an easy way students can make the game their own.
Student Instructions
End the Game
End the game when three enemies get to the cake and print the score.
Do This
- Create a variable that keeps track of how many enemies have gotten to the cake.
- Use a conditional to check whether an enemy has gotten to the cake.
- If it has, increase your variable.
- Use a conditional to check whether the value of your variable has reached three.
- If it has, cover the game with an end screen that displays the final score.
Standards Alignment
View full course alignment
CSTA K-12 Computer Science Standards (2017)
AP - Algorithms & Programming
- 2-AP-11 - Create clearly named variables that represent different data types and perform operations on their values.
- 2-AP-12 - Design and iteratively develop programs that combine control structures, including nested loops and compound conditionals.
- 2-AP-13 - Decompose problems and subproblems into parts to facilitate the design, implementation, and review of programs.
- 2-AP-16 - Incorporate existing code, media, and libraries into original programs, and give attribution.
- 2-AP-17 - Systematically test and refine programs using a range of test cases.
- 2-AP-19 - Document programs in order to make them easier to follow, test, and debug.