Lesson 17: Building an App: Canvas Painter
Overview
Students continue to practice working with arrays and are introduced to a new user interface element, the canvas. The canvas includes commands for drawing simple geometric shapes (circles, rectangles, lines) and also triggers mouse and key events like any other user interface element. Over the course of the lesson, students combine these features to make an app that allows a user to draw an image while recording every dot drawn on the canvas in an array. By processing this array in different ways, the app will allow students to redraw their image in different styles, like random, spray paint, and sketching. Along the way, students use their knowledge of functions with return values to make code which is easy to manage and reuse.
Purpose
The study of computing is in many ways the study of information and the automation of processes to transmit, transform, and learn from that information. The combination of list data structures, like the JavaScript array, and loops allows for large amounts of information to be generated, maintained, and then transformed in useful and interesting ways. The patterns used to perform these processes are frequently quite similar, even across disciplines. By recognizing when and how to use arrays and loops to store and process information, a programmer can quickly solve problems and create things at a scale unimaginable without the power of computing.
Agenda
Getting Started (5 Minutes)
Activity (60-80 Minutes)
Wrap-up (10 Minutes)
View on Code Studio
Objectives
Students will be able to:
- Programmatically control the canvas element in response to user interactions.
- Maintain a dynamically generated array through the running of a program in order to record and reuse user input.
- Use nested loops within a program to repeat a command on the same array index multiple times.
- Perform variable arithmetic within an array index to access items in an array by their relative position.
Vocabulary
- Canvas - a user interface element to use in HTML/JavaScript which acts as a digital canvas, allowing the programmatic drawing and manipulation of pixels, basic shapes, figures and images.
- Key Event - in JavaScript an event triggered by pressing or releasing a key on the keyboard. For example: "keyup" and "keydown" are event types you can specify. Use event.key - from the "event" parameter of the onEvent callback function - to figure out which key was pressed.
Introduced Code
Teaching Guide
Getting Started (5 Minutes)
Introduction to Activity
Goal
This lesson requires a fair amount of programming and combines most of the programming constructs students have learned up to this point. Briefly let students know the aim of the lesson and then move on to programming the app.
Remarks
Today we are going to be building a drawing app in App Lab. Along the way, we’ll be introduced to a couple new ideas and concepts, but for the most part, we will be combining old skills. At this point, you all know most of the core concepts of programming, and so as we move forward, we’ll spend more time thinking about interesting ways to combine them. With that in mind, let’s get into Code Studio and start building our next app!
Activity (60-80 Minutes)
App Lab: Building an App - Canvas Painter
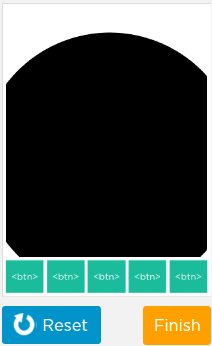
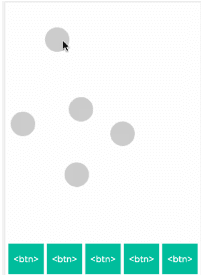
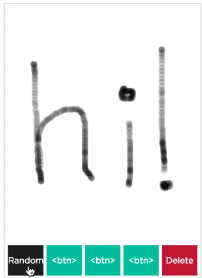
The images below show the progression of what students create throughout the lesson. It's worth just glancing over them to get a sense of what you'll be seeing.
The final product is an app that lets you draw something by dragging the mouse around the screen. Afterward, you can apply different effects to the drawing. The code saves all of the mouse coordinates in an array. The effects are created by looping over all of the coordinates to effectively re-draw the image.
Wrap-up (10 Minutes)
Share any additional features added to your app.
Goal: If students have had time to brainstorm or create additional features in their drawing apps, give them an opportunity to share. Brainstorm other ways that this stored data could be processed, and the types of effects that could be produced as a result. Some students may wish to extend this project on the Practice Create Performance Task they will complete in the next lesson.
Brainstorm other effects that could be created.
Prompt:
- "We’ve seen a few ways to process our array of events over the course of this lesson, but there are many other effects we could produce. How else could we use the information we stored in our array? What other effects do you think we could make?"
Discuss:
Either in groups or as a class, students should share the ideas they brainstormed. Ask students to describe how they would actually process the array to develop the effects, ideally by referencing specific the programming constructs they would need.
Remarks
Processing lists of information is a very powerful ability. We’ve just brainstormed many different ways we could process lists of points in a drawing app, but those same skills could be used to process lists of transactions, images, messages sent through an app, or anything else that is stored in a list. Keep an eye out for other instances where we can use list processing to create new features in your programs.
- Lesson Overview
- Student Overview
Student Instructions
Introducing Canvas
Today we are going to be building a drawing app around a new UI element called the canvas.

A canvas is simply a transparent rectangle on which you can draw basic shapes like lines, circles, and rectangles. In fact, at first you might feel like we're going to end this unit in the way we started it, making turtle drawings. Don't worry, we'll quickly move into new and exciting things we can do with this new UI element.
Do This:

-
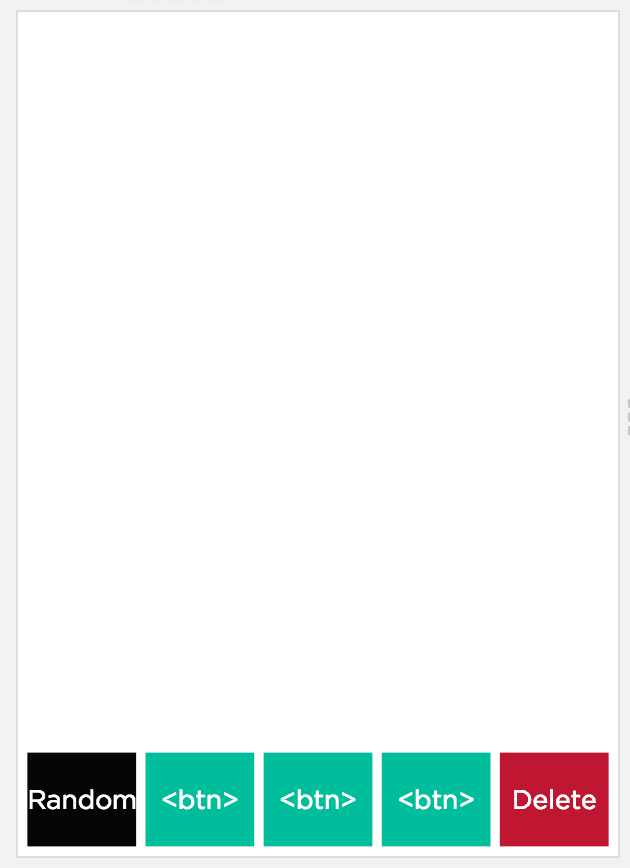
Starter code is provided which places buttons on the bottom of your screen. Ignore these for now; we'll be using them later.
-
In Design Mode, drag a canvas element into the empty space at the top of your app, resize it, and give it a descriptive ID.
- Call
setActiveCanvaswith the ID you assigned to your canvas, which makes it responsive to canvas commands. - Add a giant circle to the canvas. Use the
circlecommand. Make its radius large enough that it goes off the edge of your canvas.
Your code will look something like this:

Student Instructions
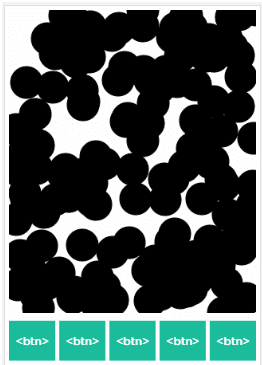
Loops on the Canvas
To make things interesting, we're going to quickly add 200 dots to our canvas by using a for loop. Locations on the canvas are relative to the top-left corner of the canvas, not the screen. Therefore you will need to know the dimensions of your canvas in order to randomly place dots throughout it. You can find this information in Design Mode:

Do This:

- Add a
forloop that runs 200 times. - Place the
circlecommand inside the loop and decrease the radius (try 20). - Use
randomNumberto randomize thexandyvalues used to place your dots. The ranges you select should be the width and height of your canvas. - COMMON MISTAKE ALERT: If you test your code before setting the
xandyvalues of the circle to random numbers, it will look like there's only one dot. But really you will have just drawn 200 dots all at the same (x, y) position.
Student Instructions
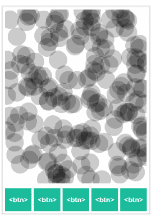
Changing Colors in Canvas
We would like to make our dots transparent so that we can see when they are drawn on top of each other. To set the color and transparency of shapes you draw on your canvas, you need to change both the stroke or outline color and the fill color. The functions setStrokeColor and setFillColor can be used to set those colors.
These functions accept strings of the form "rgba(100, 200, 100, 0.5)" as input. The first three values in the string are RGB values and the last value is the transparency, as represented by a decimal number between 0 and 1.0. All together it looks like this:


Do This:
Before the loop:
Add a setStrokeColor command to set the stroke to fully transparent.
Add a setFillColor command to set your dots to full black and mostly transparent (try a value of 0.2).
Student Instructions
Click to Add Dots
Loops are one way of quickly adding dots to our canvas, but now we're going to change our app so that the user can decide when and how many dots to add. The canvas is a UI element, so you can attach event handlers to it just like you would any other element. We're going to move the circle command inside of a click event handler so that the user can click to add individual dots.

Do This:
- Add an
onEventhandler; set its ID to your canvas ID. - Move the
circlecommand out of yourforloop and into your new event handler. - Remove the
forloop from your program. - Run your program and confirm that a single dot is added everytime a user clicks your canvas.
Student Instructions
The Event Parameter for Mouse Events
We'd like to change the app so that when the user clicks on the canvas we draw a circle right where they clicked. To do that, we need to learn more about the parameter passed by our event handler function, which by default is called event.
Recall that when we wanted to know what key the user pressed on a keyPress event, we checked the value stored in event.key. The event parameter actually stores a great deal more information about each event.
When using the mouse, the event parameter carries information like the location of the mouse, how fast it's moving, and some other things as well.
Let's get acquainted with the event parameter and what we can find out about the mouse.
Do This:
- Add the parameter
eventto the function of your event handler.

- Add a
console.logcommand inside the function of your event handler. Use it to display theeventparameter. - Run your program and click your canvas. The full contents of the
eventparameter should be displayed in the console. - Which values do you think hold the x and y coordinates? What else is there?
- We won't use all of these, but it's interesting to see just how much is available.
- Once you have experimented a little, move to the next level.

Student Instructions
Drawing Dots at Click
Currently the user can click to add dots, but they're drawn at random locations around the canvas. We're going to use information stored in the event parameter of the event handler function to place dots wherever the user clicks the mouse on the canvas.
The event parameter has two critical pieces of information we'll want, which are event.offsetX and event.offsetY. These hold the location (relative to the top left corner of the canvas) that was clicked.
Do This:

- Remove (or comment out) the
console.logstatement. - Replace the
xandyparameters of thecirclecommand withevent.offsetXandevent.offsetY. - Run your program to confirm that dots are being drawn anywhere the user clicks the mouse.
Student Instructions
Drawing on mousemove
Currently the user can click to add dots, but we want to place dots wherever the user moves the mouse on the canvas.
To place dots whenever the mouse is moved, we'll be changing the event type from click to mousemove.
Do This:

- Change the event type in your event handler from
clicktomousemove. - Run your program to confirm that dots are being drawn anywhere the user moves the mouse.
Your user is now able to draw anywhere they want on the screen!
Student Instructions
Draw When a Key is Pressed
This app now lets the user draw, but they have no control of whether the pen is up or down. Let's give the user the ability to choose when to put down the pen. We won't even need to add a new event handler to our app!
You may have noticed that the event parameter includes information about whether certain keys were pressed when the event fired. They are stored in variables with names like shiftKey or altKey and are stored as boolean values (true / false). We are going to use the shiftKey variable to decide when we should draw circles.
Do This:

-
Add an
ifstatement inside your event handler function where the condition is based on the value stored inevent.shiftKey: IfshiftKeyis true, then draw the circle.
-
You might want to decrease the radius of your circle (for example to 5).
-
Run the program and confirm that dots are only drawn when the shift key is pressed.
- The effect should be that the user can pick up and put down the pen to draw.
- Hold the shift key down and move the mouse to draw.
- Release the shift key to stop drawing.
(NOTE: If you wish, use console.log to display the values in event again. You'll see event.shiftKey is one of the values stored.)
- Storing Information
- 10
Student Instructions
Store Your Dots
Now we're going to get into the core of the activity. We will be creating a record of every dot your user draws.
To do this, we will append every event parameter to an array as events are generated. When we store every mouse location in an array, we can make many interesting effects and redraw the image in different ways, by looping over the array. First let's just make sure we can capture them all.
Do This:
-
Create a new array outside the event handler function:
var eventList = []. -
In your event handler, before you call the
circlecommand, useappendItemto add theeventparameter toeventList.
-
Run the program and draw some dots.
-
In the Debug Console type
console.log(eventList)and inspect the contents. You should have a record of every event parameter used to draw a dot! (It might be a lot.)
Student Instructions
Delete Button
We are finally going to use those buttons! Each one will trigger an event handler that processes the array eventList to create a visual effect with the mouse data you have stored. The first effect we are going to create is delete.
You may want to provide your user with a way to start over with their drawing. In order to do this, you will need to both clear the canvas and delete all items from eventList. The easiest way to delete everything from the list is to simply set the value of eventList to be a new empty list.
Do This:

-
In Design Mode, set the styling and text of one button to indicate it's the "delete" or "start over" button. Give your button a descriptive ID.
-
Add a click event handler to your button.
-
Within the event handler call
clearCanvas. -
Set
eventListto the empty array (i.e.,eventList = []).
Test your program to make sure that starting over works the way it should.
Student Instructions
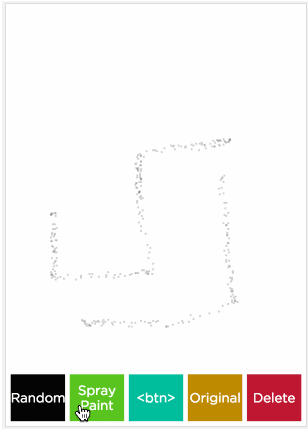
Redraw Random - Part 1
The next effect we are going to create is "random." We will be redrawing the image but with randomly sized dots.
We'll be doing this in two steps. For now, all you need to do is change the first button in the row to have the proper styling and attach a click event handler to it. In addition, clear the canvas from inside the event handler so we are ready to redraw our new image. We don't want to delete all the items from the array though, as we will use them to redraw. Once you've done that, move on to the next exercise where we'll write the actual code in our event handler.
Do This:

-
In Design Mode, pick a button to use for Random. Set the styling and text of the button. The image below shows one possible option, but you can style it however you like.
-
Give your button a descriptive ID.
-
Add a click event handler to your button.
-
Call
clearCanvasfrom inside the event handler so the canvas is ready for the redraw.
Student Instructions
Redraw Random - Part 2
Now we're ready to write the code for our "Random" effect. To do this, we will be clearing the canvas and then processing the array eventList to redraw all the dots with a random radius.
You already set up the clear canvas, so next we'll need to process our array in order to find out the event information for each dot. You'll need to create a for loop that iterates through every index in eventList (recall the length command). Within your loop, you will be drawing dots referencing items stored in the array.
As you write this code, remember that you can treat an individual element of an array exactly like the kind of data it stores. Inside a for loop, the event at index i can be accessed with the notation eventList[i] and the offsetX of that event can be accessed with eventList[i].offsetX. Again, you are essentially treating the array element as if it were the data it contains.

Do This:

(NOTE: Everything listed below is shown in code animation above.)
Inside the "Random" button event handler...
Add a for loop that runs i from 0 up to eventList.length to process over the array.
Add a circle command inside your loop.
Set the x and y parameters of the circle to eventList[i].offsetX and eventList[i].offsetY, respectively.
Set the radius parameter to some randomNumber. Pick any range you like. You can always change it later.
* Test your program by drawing a figure and then hitting your "Randomize" button. It should be the same drawing, but now with randomly sized dots!
Student Instructions
Redraw Original
If you were able to get that working and understand what you did, congratulations! That was some serious programming! If not, take a moment to go back and talk through the different components with a classmate. Most of the work we'll be doing for the rest of this lesson uses similar patterns, and you'll want to be comfortable with them as we add more complexity to our app.
The first thing we are going to do is create an "Original" button that will redraw the image with the same circle radius you used before. The process will be nearly identical to how you added the "Random" button.
In fact, the code to redraw the original is exactly the same, except instead of making the radius of the circle be random, it will just be the fixed value you used originally (probably radius 5 or so).

Do This:

( NOTE: The instructions below are shown in the code animation above.)
- Style a button, give it label like "Original," give it a meaningful ID, and add a "click" event handler.
- Inside the event handler for your "Original" button...
- Copy the code from the "Random" button event handler.
- Paste it inside the event handler for the "Original" button.
- Set the
radiusparameter to whatever value you used when you originally drew dots.
- Test your program by drawing a figure and then hitting your "Randomize" button. Then hit the "Original" button. Your original drawing should appear.
Student Instructions
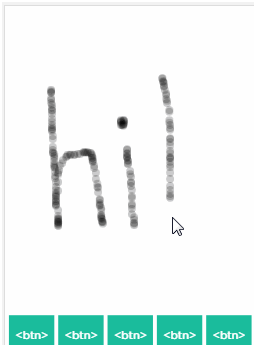
Adjusting Circle Size
Among the other pieces of information contained in each event parameter are the values movementX and movementY. These numbers tell us how far (in pixels) the mouse moved since the last mouse event was triggered, and can be used to measure the speed of the mouse. If the movement is large, the mouse is moving fast; if the movement is small, the mouse is moving slowly.
Let's use the mouse movement speed to make a cool effect. When we draw with a real pen or brush, the line usually gets thin when making quick strokes and is wider and darker when making slower ones. We can generate this effect by using movementX and movementY to calculate the radius for the circle. Since this calculation might be a little tricky, a smart thing to do would be to write a function that takes movementX and movementY as parameters and returns a value that should be used as the radius.

There are several ways to do this. One possible way to write the function is provided on the right, which uses some arithmetic tricks. The function to the right is actually only three lines of code but is heavily commented to explain what it's doing. It makes use of a function called Math.abs which returns the absolute value of a number. Feel free to use this or another method of converting movementX and movementY into a radius.
What is Absolute Value? [click to expand]
Math.abs takes a number as input and returns the positive version of this number.
In math, absolute value is often written with this | | symbol. So |10| is the absolute value of ten and |-10| is the absolute value of negative ten. Both evaluate to 10.
In Javascript we use Math.abs instead of | |. Math.abs(-10) and Math.abs(10) both evaluate to 10.
Do This:
- Write a function like the one above that accepts two parameters (one each for
movementXandmovementY) and returns a radius. A higher speed should lead to a smaller radius. - Inside your
mousemoveevent handler, set the radius of the circle to the value returned by your function, where the function takesevent.movementXandevent.movementYas input. For example, if using the function above, your code would be:
- Run your program and confirm that when you draw, the speed of the mouse affects the radius of the dots. The effect should look something like what's below

Student Instructions
Fix the "Original" Button
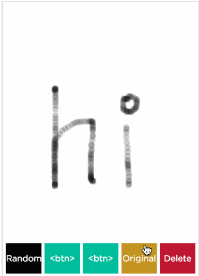
Our "Original" button is now slightly broken because the effect it renders doesn't match our new free-form drawing which takes the movement of the mouse into account - it just draws fixed-size cricles.
Let's fix the "Original" button.
Do This:
In the event handler function for the "Original" button:
- Change the value used for the radius from a fixed value to the same thing calculated for the free-form drawing. Since you wrote a function to do this calculation, it should be easy to call it from this code as well!
- The slight difference will be that you will be looping over the array of events. So the line of code that draws the circle might look like the one below. This line of code is certainly a mouthful, but it's basically the same as the line of code in your
mousemoveevent handler; it just references the event in the list instead.
- Test your program to confirm that clicking the "Original" button creates the same effect that occurs when doing free-form drawing.

Student Instructions
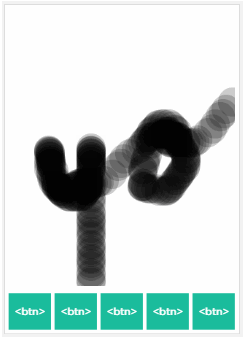
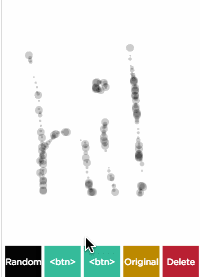
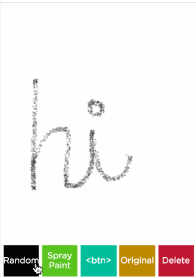
Making Spray Paint
The next effect we would like to create is a "spray paint" effect. Instead of drawing a single dot for every location stored in eventList, we'll draw many small dots randomly placed around each location.
We are going to start off just practicing drawing a circle whose x and y locations use offsetX and offsetY with a small random value added. This makes the line of code to draw the circle kind of long, but hopefully it's easy to understand if you read it carefully.

Do This:
- Set the style of another button in Design Mode, give a label like "Spray Paint," give it a descriptive ID, and attach a click event handler to it.
- Copy the code from the "Original" button into the event handler for spray paint.
- Change the code for
circleso that it will draw a dot whose x and y locations useoffsetXandoffsetYwith a small random value added.
- Run your app to make sure it is drawing small dots close to the original position. Look at the example below.

Student Instructions
Making Spray Paint with Nested Loops
In order to make "Spray Paint" look more real you will need to draw multiple dots randomly placed around the original x and y locations. In order to do this, you will place one for loop inside of another, also known as a nested loop. You already have the main loop which visits every index in eventList. The inner loop should draw 5 circles whose x and y locations use offsetX and offsetY with a small random value added.
Nested Loops

When nesting loops, it is important that you use different variables to count your iterations. Look at the example at right. These nested loops effectively say: "for every possible value in eventList.length, run a loop 5 times".
Since i is used as the counter variable in the outer loop, we need to use a different counter variable for the inner for loop, or things will go haywire. Why? If both loops used i as a counter variable, the inner loop would keep changing i and the outer loop wouldn't count properly. The example uses j as the inner loop variable, but you could use anything that's not i.

Do This:

(Note: Steps shown in animation above.)
- Add a
forloop inside the existingforloop in the spray paint event handler. - Change the counter variable to something other than
ifor the innerforloop. - Change the boolean condition so the inner loop will run 5 times.
- Move the circle code inside both
forloops. - Run your app and confirm that your new button creates a spray paint effect, as shown below.
- Using Stored Information
- 19
Student Instructions
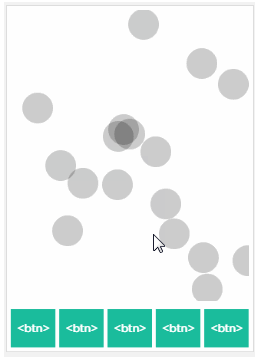
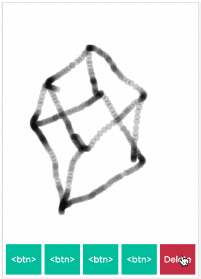
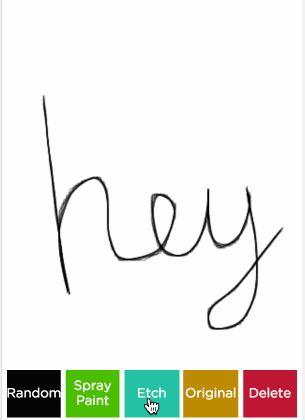
Relative Indexes
When looping over an array, we use a counter variable (typically i) to keep track of which index we're at. We can then access the contents at each index with the syntax list[i].
If we want, however, we could access the contents of the next element as well, since its index is just one greater. For example, if we are currently focused on the element at index i, then list[i+1] gives us access to the next element in the array. In other words, you can reference indexes relative to your counter variable.

We are going to use relative indexing to create our final effect, which will look sort of like an etching of the image. The idea is simple: for every (x, y) location in the event list, draw a straight line between that location and the location stored 10 spots further down the array. You will use the line command to draw a line connecting these points.
Do This:
- Read the documentation for
line. - Set the style of the final button in Design Mode, give a label like "Etch," give it a descriptive ID, and attach a click event handler to it.
- Call
clearCanvasto clear the screen. - Create a
forloop that counts from 0 toeventList.length - 10.- Why do you think we're not counting over the entire array?
- Use
lineto draw a line between the (x, y) locations ofeventList[i]andeventList[i+10]. The full line of code will be another big one:
- Use
setStrokeColorand/orsetStrokeWidthinside the event handler to make the lines visible; otherwise, they will be transparent, since we set the stroke color to transparent at the beginning of the program. - Run your app and confirm that your new button creates a sketch effect, as shown below.

- Project: Canvas Painter
- 20
Student Instructions
Create Your Own Effect!
You've just seen several ways that we can process our array eventList in order to create different effects. Now it's time to make your own! Extend the functionality of one of the effects you just created, or create an entirely new one. What else could you do with the information you've stored in your array? How else might you combine the programming tools you've developed?
Do This:
- Extend the functionality of one of the effects, or create an entirely new one of your own!
Standards Alignment
View full course alignment
Computer Science Principles
1.2 - Computing enables people to use creative development processes to create computational artifacts for creative expression or to solve a problem.
1.2.1 - Create a computational artifact for creative expression. [P2]
- 1.2.1A - A computational artifact is anything created by a human using a computer and can be, but is not limited to, a program, an image, audio, video, a presentation, or a web page file.
- 1.2.1B - Creating computational artifacts requires understanding and using software tools and services.
- 1.2.1C - Computing tools and techniques are used to create computational artifacts and can include, but are not limited to, programming IDEs, spreadsheets, 3D printers, or text editors.
- 1.2.1D - A creatively developed computational artifact can be created by using nontraditional, nonprescribed computing techniques.
1.3 - Computing can extend traditional forms of human expression and experience.
1.3.1 - Use computing tools and techniques for creative expression. [P2]
- 1.3.1C - Digital images can be created by generating pixel patterns, manipulating existing digital images, or combining images.
- 1.3.1D - Digital effects and animations can be created by using existing software or modified software that includes functionality to implement the effects and animations.
- 1.3.1E - Computing enables creative exploration of both real and virtual phenomena.
2.2 - Multiple levels of abstraction are used to write programs or create other computational artifacts
2.2.1 - Develop an abstraction when writing a program or creating other computational artifacts. [P2]
- 2.2.1A - The process of developing an abstraction involves removing detail and generalizing functionality.
- 2.2.1B - An abstraction extracts common features from specific examples in order to generalize concepts.
- 2.2.1C - An abstraction generalizes functionality with input parameters that allow software reuse.
2.2.2 - Use multiple levels of abstraction to write programs. [P3]
- 2.2.2A - Software is developed using multiple levels of abstractions, such as constants, expressions, statements, procedures, and libraries.
- 2.2.2B - Being aware of and using multiple levels of abstraction in developing programs helps to more effectively apply available resources and tools to solve problems.
4.1 - Algorithms are precise sequences of instructions for processes that can be executed by a computer and are implemented using programming languages.
4.1.1 - Develop an algorithm for implementation in a program. [P2]
- 4.1.1A - Sequencing, selection, and iteration are building blocks of algorithms.
- 4.1.1B - Sequencing is the application of each step of an algorithm in the order in which the statements are given.
- 4.1.1C - Selection uses a Boolean condition to determine which of two parts of an algorithm is used.
- 4.1.1D - Iteration is the repetition of part of an algorithm until a condition is met or for a specified number of times.
4.1.2 - Express an algorithm in a language. [P5]
- 4.1.2A - Languages for algorithms include natural language, pseudocode, and visual and textual programming languages.
- 4.1.2B - Natural language and pseudocode describe algorithms so that humans can understand them.
- 4.1.2C - Algorithms described in programming languages can be executed on a computer.
- 4.1.2G - Every algorithm can be constructed using only sequencing, selection, and iteration.
- 4.1.2I - Clarity and readability are important considerations when expressing an algorithm in a language.
5.1 - Programs can be developed for creative expression, to satisfy personal curiosity, to create new knowledge, or to solve problems (to help people, organizations, or society).
5.1.1 - Develop a program for creative expression, to satisfy personal curiosity, or to create new knowledge. [P2]
- 5.1.1A - Programs are developed and used in a variety of ways by a wide range of people depending on the goals of the programmer.
- 5.1.1B - Programs developed for creative expression, to satisfy personal curiosity, or to create new knowledge may have visual, audible, or tactile inputs and outputs.
- 5.1.1C - Programs developed for creative expression, to satisfy personal curiosity, or to create new knowledge may be developed with different standards or methods than programs developed for widespread distribution.
- 5.1.1D - Additional desired outcomes may be realized independently of the original purpose of the program.
- 5.1.1E - A computer program or the results of running a program may be rapidly shared with a large number of users and can have widespread impact on individuals, organizations, and society
5.1.2 - Develop a correct program to solve problems. [P2]
- 5.1.2A - An iterative process of program development helps in developing a correct program to solve problems.
- 5.1.2B - Developing correct program components and then combining them helps in creating correct programs.
- 5.1.2C - Incrementally adding tested program segments to correct, working programs helps create large correct programs.
- 5.1.2J - A programmer designs, implements, tests, debugs, and maintains programs when solving problems.
5.3 - Programming is facilitated by appropriate abstractions.
5.3.1 - Use abstraction to manage complexity in programs. [P3]
- 5.3.1A - Procedures are reusable programming abstractions.
- 5.3.1B - A function is a named grouping of programming instructions.
- 5.3.1C - Procedures reduce the complexity of writing and maintaining programs.
- 5.3.1D - Procedures have names and may have parameters and return values.
- 5.3.1E - Parameterization can generalize a specific solution.
- 5.3.1F - Parameters generalize a solution by allowing a function to be used instead of duplicated code
- 5.3.1G - Parameters provide different values as input to procedures when they are called in a program.
- 5.3.1J - Integers and floatingpoint numbers are used in programs without requiring understanding of how they are implemented.
- 5.3.1K - Lists and list operations, such as add, remove, and search, are common in many programs.
- 5.3.1L - Using lists and procedures as abstractions in programming can result in programs that are easier to develop and maintain.
5.4 - Programs are developed, maintained, and used by people for different purposes.
5.4.1 - Evaluate the correctness of a program. [P4]
- 5.4.1A - Program style can affect the determination of program correctness.
- 5.4.1B - Duplicated code can make it harder to reason about a program.
- 5.4.1C - Meaningful names for variables and procedures help people better understand programs.
- 5.4.1D - Longer code blocks are harder to reason about than shorter code blocks in a program.
- 5.4.1E - Locating and correcting errors in a program is called debugging the program.
- 5.4.1F - Knowledge of what a program is supposed to do is required in order to find most program errors.
- 5.4.1G - Examples of intended behavior on specific inputs help people understand what a program is supposed to do.
- 5.4.1H - Visual displays (or different modalities) of program state can help in finding errors.
- 5.4.1L - An explanation of a program helps people understand the functionality and purpose of it.
- 5.4.1M - The functionality of a program is often described by how a user interacts with it.
- 5.4.1N - The functionality of a program is best described at a high level by what the program does, not at the lower level of how the program statements work to accomplish this.
5.5 - Programming uses mathematical and logical concepts.
5.5.1 - Employ appropriate mathematical and logical concepts in programming. [P1]
- 5.5.1D - Mathematical expressions using arithmetic operators are part of most programming languages.
- 5.5.1E - Logical concepts and Boolean algebra are fundamental to programming.
- 5.5.1F - Compound expressions using and, or, and not are part of most programming languages.
- 5.5.1G - Intuitive and formal reasoning about program components using Boolean concepts helps in developing correct programs.
- 5.5.1H - Computational methods may use lists and collections to solve problems.
- 5.5.1I - Lists and other collections can be treated as abstract data types (ADTs) in developing programs.
- 5.5.1J - Basic operations on collections include adding elements, removing elements, iterating over all elements, and determining whether an element is in a collection.
CSTA K-12 Computer Science Standards (2017)
AP - Algorithms & Programming
- 3A-AP-16 - Design and iteratively develop computational artifacts for practical intent, personal expression, or to address a societal issue by using events to initiate instructions.