Lesson 2: Designing Screens with Code
App Lab
Overview
In Unit 4 students learned a very simple approach to app development in App Lab that required a separate screen for most interactions. To expand the kinds of apps that students can make, and to encourage them to think in new ways about how users interact with apps, we introduce the setProperty() block. This command can be used to set the content and properties of various UI elements, allowing students to write programs that update information on a single screen, instead of manually creating duplicate screens. In this lesson students build up simple apps that only require a single screen, the content of which is changed using setProperty().
Purpose
This lesson allows students some time to get back into programming with App Lab before introducing the Circuit Playground, but also introduces the useful concept of a setter. In Unit 4, students primarily used setScreen() to make their apps respond to user interaction. While this is a simple and useful technique, it can lead to a lot of duplication of content across multiple screens. By using setters, and later getters, students can write apps that actually change the content on a single screen, by showing and hiding or changing the content or look of various elements.
Once students have learned about using getters and setters with UI elements, encourage them to think critically about when to use a separate screen in the design phase of an app. If screens are more alike than different, it might be more effective to just change the elements on screen in reaction to input instead of duplicating content across multiple screens. While students are only introduced to setProperty() right now, they will later learn the partner command getProperty().
Assessment Opportunities
-
Set the properties of UI elements using code
Code Studio: See rubric on bubble 4
-
Respond to user input using an event handler
Code Studio: See rubric on bubble 9
-
Write programs that change multiple elements on a single screen instead of changing screens
Code Studio: See rubric on bubble 14
Agenda
Lesson Modifications
Warm Up (5 min)
Activity (45 to 60 minutes)
Wrap Up (5 min)
View on Code Studio
Objectives
Students will be able to:
- Set the properties of UI elements using code
- Respond to user input using an event handler
- Write programs that change multiple elements on a single screen instead of changing screens
Introduced Code
Teaching Guide
Lesson Modifications
 Attention, teachers! If you are teaching virtually or in a socially-distanced classroom, we have recommendations for alternate lessons that can be used for this unit on physical computing. Click Here to read our recommendations for Unit 6.
Warm Up (5 min)
Maker App Updates
For Windows & Mac users: we've recently updated the way that students can log in with Google using the Maker App. Please see this forum post for more information about these updates and how to continue using Google to log in to the Maker App.
UI Element Properties Refresher
Discussion Goal
The goal of this disucssion is to prime students to think about the properties of various design elements, which they will learn to change with code later in this lesson. You might ask students to think back to a similar discussion we had in Unit 2 when trying to describe what a web page looks like, or to the properties of a sprite from Unit 3
Display: Show students this example image
Discuss: How would you describe to somebody else how to recreate this screen? What specific details would they need to know about each design element?
Activity (45 to 60 minutes)
Designing with setProperty()
Transition: Head to Code Studio
Share: The final level in this lesson allows students to customize and submit an "Emotion Machine" app. If time, allow students to share their programs.
Wrap Up (5 min)
Reflecting on Unit 4
Discussion Goal
Goal: This discussion is intended to clarify for students why we are changing UI elements with code, and how it might actually allow them to solve problems that came up in Unit 4. From this point on students will need to make reasoned choices about when to use separate screens in a program and when to update elements with code.
Prompt: Think back to the app you prototyped in Unit 4. Knowing what you know about using setProperty() to change UI elements, how might you change your app prototype?
Discuss: Have the class share the kinds of things they came up with. See if the class can come up with some broad types of features that weren't possible, or were cumbersome, to do with screens alone.
- Lesson Overview
- Student Overview
Student Instructions
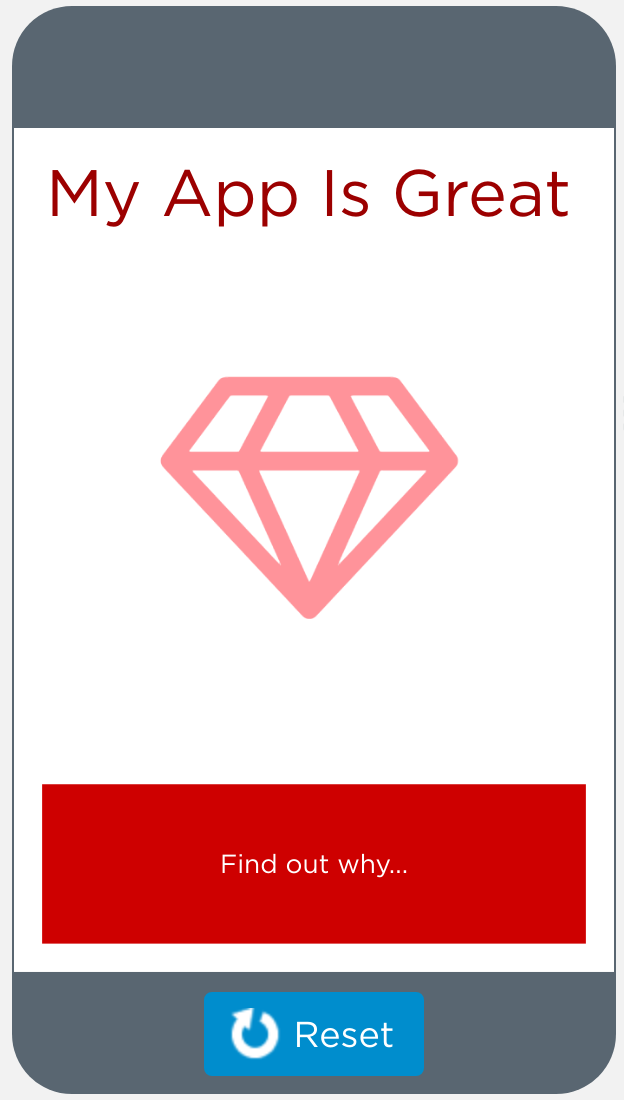
Read the code and predict what this app will look like when run.


Student Instructions
Changing the Text
The setProperty block can be used to change lots of things about your design elements, including the text they contain.
Do This
- Drag out a
setPropertyblock - For the first parameter, select "name" (the element's id)
- For the second parameter, select "text" (the property you want to set)
- For the third parameter, write your name in quotes (the value to set)
Note: We've removed the Design Mode tab for now so you can practice working with setProperty, but it'll come back later once you're building apps of your own.
Assessment Opportunities
Use setters to access and manipulate the properties of elements in a system.
Extensive Evidence
The red rectangle is in the correct position, and no other rectangles have been moved. The program only uses two blocks.
Convincing Evidence
The red rectangle has been moved, but it may not be in the correct position, or there may be extra blocks of code. The other rectangles are in their original positions.
Limited Evidence
Some rectangles have been moved, but the picture does not look similar to the example.
No Evidence
The rectangles have not been moved.
Student Instructions
Changing Position
Every design element (except for the screen) has an "x" and a "y" property that controls its position.
Do This
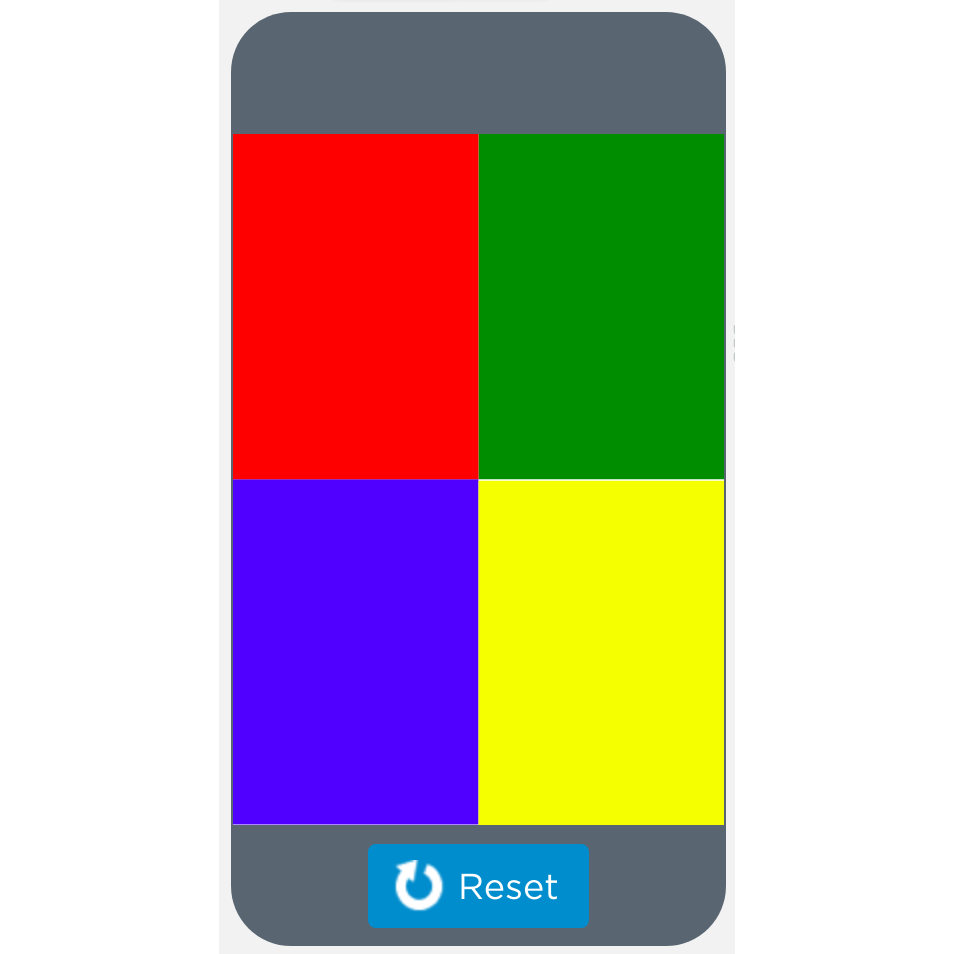
Using the setProperty block, move "red_button" so that it matches the image to the right. (Click on the image to see the full size.)
Note: We've removed the Design Mode tab for now so you can practice working with setProperty, but it'll come back later once you're building apps of your own.
- Designing Screens with Code
- Student Overview
Student Instructions
Changing With a Click
It's not really useful to only set a property when your program is first run. After all, you could just do all of that in Design Mode. When you use an onEvent block with setProperty, you're able to do things you couldn't do with Design Mode alone.
Do This
We've provided an empty onEvent block that's watching the "smiley" image. Inside the onEvent block, use two setProperty blocks to move the smiley somewhere else (it doesn't really matter where for now). Test your program by running it and clicking on the smiley.
Student Instructions

Randomization
Moving on the first click is fine, but this smiley would be even cooler if it moved somewhere new every time we clicked. Fortunately, we can use the randomNumber block to do just that.
Do This
Instead of setting the "x" and "y" properties to a specific number, use the randomNumber block to pick a new random "x" and "y" each time the smiley is clicked.
Tip: The App Lab screen is 320 pixels wide by 450 pixels tall. What range of random numbers will ensure that the smiley is always visible on screen?
Student Instructions
Hidden
Design elements have a property called "hidden" that controls whether the element should show on screen or not. We are going to use this property to create an alarm app. Notice that when the program starts one button is hidden, and one is not.
We have already set up an event handler for the "triggerAlarmButton" which will do two things when clicked:
- Change the "text" property of "statusLabel" to "on"
- Set the "hidden" property of "stopAlarmButton" to
false(meaning it should not be hidden)
Do This
- Run the program and click "Trigger Alarm" to see how it works
- Add code to the provided event handler that hides the "triggerAlarmButton"
Note: the button "stopAlarmButton" is already on the screen, but because its "hidden" property is marked true, it isn't shown when the program starts.
Assessment Opportunities
Use events handlers to respond to user interaction
Extensive Evidence
When the "stopAlarmButton" is pressed, the status text changes to "OFF" and the button disappears. There is no extra code in the program.
Convincing Evidence
When the "stopAlarmButton" is pressed, the program responds in some way, but not necessarily as described in the instructions, or there may be unnecessary code triggered by the event.
Limited Evidence
A second event has been created, but it may not be triggered at appropriate times, or the program may have created unnecessary events.
No Evidence
No new events were created.
Student Instructions
Showing/Hiding
This alarm app isn't super useful if you can't turn the alarm off once it's been triggered. Let's fix that.
Do This
Create a second event to watch for the "stopAlarmButton" to be clicked. When that event is triggered:
- Change the status text to "OFF"
- Hide the "stopAlarmButton"
Hint: "hidden" is a boolean property. If we used false to make the button show up, what should you use to make it hidden again?
- Emotion Machine Example
- Student Overview
The Emotion Machine
Check out this Emotion Machine app that you'll be building next. Try clicking on the buttons to see how it works.
Do This
Try out the app, and then with a neighbor discuss:
- What events handlers does this app use?
- Which elements are being changed with code?
- Which properties are being changed when you click a button?
Student Instructions
Changing Images
The first thing you'll need your emotion machine to do is change to the appropriate image when a button is clicked. If you look at the starting code, you'll see that we already added setProperty("face", "image", "icon://fa-smile-o") to change to a smiley face when you click happy.
Do This
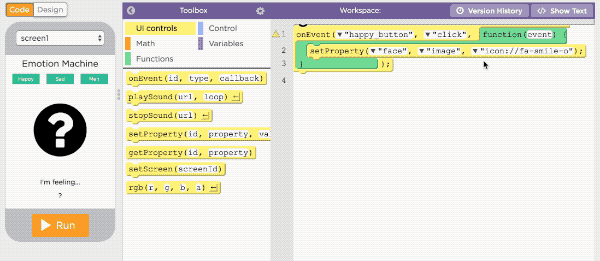
Create an event handler for "sad_button" and make it change to a sad emoji. To do this you'll need to set the "image" property of the image with id "face".
Tip: when you click the last dropdown in the setProperty block click "Choose..." to go to your media library. From there you can select an icon from our icon library or upload an image of your own.
Student Instructions
Changing Color
If you look back at the example for this app, you should notice that not only do the emojis change when you click a button, but their color changes as well.
Do This
In each of the event handlers, set the "icon-color" property of "face". Pick a warm color for happy and a cool color for sad.
Student Instructions
Setting Text
Your happy and sad buttons should be almost completely functional now. The only thing they still need to do is change the text at the bottom of the screen.
Do This
Make each of the event handlers change the text of "feeling" to the appropriate emotion (either "happy" or "sad")
Assessment Opportunities
Use event handlers to respond to user interaction, and use settings to manipulate the properties of elements in a system.
Extensive Evidence
The program has three buttons with correct labels, and when a button is clicked, the correct icon and description of emotion appear.
Convincing Evidence
The program has three buttons, and the program responds in some way to each button click, but the response may not be exactly as described in the instructions.
Limited Evidence
At least one button other than the "Happy" button responds to being clicked in some way.
No Evidence
No buttons other than the "Happy" button respond to being clicked.
Student Instructions
Add Another Emotion
In the example app you saw earlier, you could set the emotion to happy, sad, or meh. Your app only has happy and sad, can you add a third emotion?
Do This
Using all of the same techniques you used for the happy and sad buttons, create a third emotion button. You could stick with meh, or you could pick an emotion of your own.
When you're all done, feel free to add more emotions or features before submitting your final version.
Standards Alignment
View full course alignment
CSTA K-12 Computer Science Standards (2017)
AP - Algorithms & Programming
- 2-AP-11 - Create clearly named variables that represent different data types and perform operations on their values.
- 2-AP-13 - Decompose problems and subproblems into parts to facilitate the design, implementation, and review of programs.
- 2-AP-16 - Incorporate existing code, media, and libraries into original programs, and give attribution.
- 2-AP-19 - Document programs in order to make them easier to follow, test, and debug.