Lesson 2: Plotting Shapes
Overview
Students explore the challenges of communicating how to draw with shapes and use a tool that introduces how this problem is approached in Game Lab. The warm up activity quickly demonstrates the challenges of communicating position without some shared reference point. In the main activity students explore a Game Lab tool that allows students to interactively place shapes on Game Lab's 400 by 400 grid. They then take turns instructing a partner how to draw a hidden image using this tool, accounting for many challenges students will encounter when programming in Game Lab. Students optionally create their own image to communicate before a debrief discussion.
Purpose
The primary purpose of this lesson is to introduce students to the coordinate system they will use in Game Lab. Students may have limited experience with using a coordinate grid or may struggle with the "flipped" y-axis in Game Lab. The drawing tool also forces students to think about other features of Game Lab students will see when they begin programming in the next lesson. These include the need to consider order while drawing, the need to specify color, and the fact that circles are positioned by their center and squares by their top-left corner. By the end of this activity, students should be ready to transfer what they have learned about communicating position to the programming they will do in the next lesson.
Agenda
Warm Up (10 min)
Activity (35 min)
Wrap Up (5 min)
View on Code Studio
Objectives
Students will be able to:
- Reason about locations on the Game Lab coordinate grid
- Communicate how to draw an image in Game Lab, accounting for shape position, color, and order
Links
Heads Up! Please make a copy of any documents you plan to share with students.
For the Teachers
- Sample Shape Drawing - Exemplar
- Drawing Shapes - Exemplar
For the Students
- Drawing Shapes - Activity Guide
Teaching Guide
Warm Up (10 min)
Communicating Drawing Information
Remarks
We saw a lot of different programs yesterday, and you started to think about what types you might want to create. When we create a program, one of the things we need to do is draw everything on the screen. We're going to try that with a "student" computer today.
Ask one or two volunteers to come to the front of the room and act as "computers" for the activity. They should sit with their backs to the board so that they cannot see what is being projected. Give each volunteer a blank sheet of paper.
Display: Project Sample Shape Drawing - Exemplar where it can be seen by the class.
Remarks
You will need to explain to our "computer" how to draw the picture. In the end, we'll compare the drawing to the actual picture.
Give the students a minute or two to describe the drawing as the students at the front of the room try to draw it. After one minute, stop them and allow the students to compare both pictures.
Prompt: What are the different "challenges" or problems we're going to need to solve in order to successfully communicate these kinds of drawings.
Discussion Goal
Goal This discussion is intended to bring up some challenges that students will need to address in the next few lessons, such as how to specify position, order, and color. The students don't necessarily need to decide how they would specify such things, but recognize that they will need a method for doing so. Students who have just come out of the HTML unit may make connections to how HTML helped solve similar problems.
Discuss: Students should silently write their answers in their journals. Afterwards they should discuss with a partner and finally with the entire class.
Remarks
There were several challenges we needed to solve in this activity. We need to be able to clearly communicate position, color, and order of the shapes. We're going to start exploring how to solve this problem.
Activity (35 min)
Drawing with a Computer
Group: Place students in pairs.
Transition: Have one member of each group open a laptop and go to the contents for this lesson. There is a single level with a Game Lab tool.
Prompt: Working with your partner take two or three minutes to figure out how this tool works. Afterwards be ready to share as a class.
Discussion Goal
Goal: Rather than doing a live-demo of the tool, use this strategy to let students explore the tool themselves. Afterwards use the debrief to ensure all students are aware of key features of the tool. The most important components are the grid and the fact that the mouse coordinates are displayed below the drawing space.
Content Corner
Location of the Origin The origin of this grid, as well as the origin in Game Lab, lies at the top left corner. This reflects the fact that documents tend to start at the top left, and ensures that every point on the plane has positive coordinates.
Discuss: After pairs have had a chance to work with the tool run a quick share-out where students discuss features they notice.
Drawing Shapes
Distribute the Drawing Shapes - Activity Guide to each pair, ensuring that one student (Student A) receives the first two pages and the other student (Student B) receives the second two pages. Students should not look at each other's papers.
Set Up: In this activity, students will try to recreate images based on a partner's directions. The student who is drawing will use the shape drawing tool on Game Lab to draw the shapes. Students should keep their drawings hidden from one another throughout the activity. While completing a drawing the instruction giver should also not be able to see the computer screen.
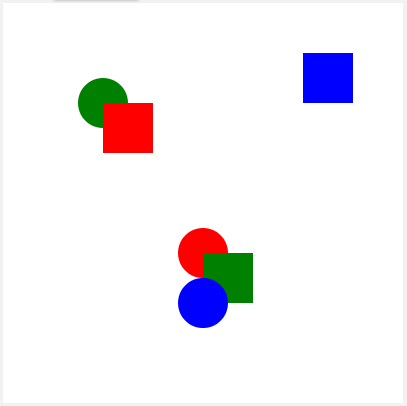
Drawing 1: Each member of the pair should complete their first drawing, taking turns giving instructions and using the tool. These drawings do not feature any overlapping shapes, but students may need to grapple with the fact that circles are drawn from the middle and squares from the top left corner. Additionally students may just struggle with the direction of the Y-axis.
Discuss: Give pairs a couple minutes to discuss any common issues they're noticing in trying to complete their drawings.
Drawing 2: Each member of the pair should describe their second drawing to their partner. These drawing feature overlapping shapes and so students will need to consider the order in which shapes are being placed as well as when they should change the color of the pen.
Teaching Tip
When to Move On: Determine whether this last activity is worth the time in your schedule. Giving students a chance to create and communicate their own drawing can help reinforce their knowledge, but if students are obviously achieving the learning objectives of the lesson without it then you can also just move to the wrap up to synthesize their learning.
Draw Your Own: If time allows, give students a chance to create their own drawing to communicate to their partner.
Remarks
When we make images, we need a way to communicate exactly where each shape goes. The coordinate plane helps us to do that. Our coordinate plane has two coordinates, x and y. The x-coordinate tells us how far our shape is from the left of the grid. The y-coordinate tells us how far our shape is from the top of the grid. The black dots on the shapes help you be very specific about how the shape is placed on the grid.
Wrap Up (5 min)
Discussion Goal
Goal This discussion should act as a recap of what students learned about the grid system in Game Lab. This wrap up should also make references back to the problem solving process. Students saw at the beginning of the lesson that there is a problem of communicating how to draw shapes. What they have seen in Game Lab today is the solution to that problem. This discussion should be used to reinforce that the grid system students saw today is different from the one they may have seen in a math class. They should see, however, that both solve the same problem. Finally this discussion leads into a teacher explanation of why the grid in Game Lab is "flipped".
Journaling
Journal: Have students reflect on each of the following prompts
- What problem is the grid helping to solve in Game Lab?
- Have you seen different ways of solving this problem in the past? What are they?
Discuss: Have pairs share their answers with one another. Then open up the discussion to the whole class.
Remarks
At the beginning of class we saw that communicating how to draw even simple shapes can be pretty challenging. The grid we learned about today is one solution to this problem but there are many others that could've worked. In fact a lot of you probably noticed that the grid in Game Lab is "flipped". Computer screens come in all different shapes and sizes, as does the content we show on them. We need to agree on one point where all the content can grow from. Since we read starting at the top left corner, the grid on a computer screen starts at the top left corner as well. There's also the benefit of not having to use any negative numbers to talk about locations on the screen. Don't worry if this flipped grid is a little tricky still. We'll have plenty more time to work on it in coming lessons.
- Lesson Overview
- Teacher Overview
- Student Overview
- Drawing Shapes - Exemplar (PDF | DOCX)
Overview
This lesson explores the challenges of communicating how to draw with shapes and use a tool that introduces how this problem is approached in Game Lab.The class uses a Game Lab tool to interactively place shapes on Game Lab's 400 by 400 grid. Partners then take turns instructing each other how to draw a hidden image using this tool, accounting for many of the challenges of programming in Game Lab.
Resources
- Drawing Shapes
- Student Overview
Drawing Shapes
Explore using this tool that lets you draw different colored shapes.
Make sure you hit "Run" and try out turning on the grid to help you place shapes precisely.

Standards Alignment
View full course alignment
CSTA K-12 Computer Science Standards (2017)
AP - Algorithms & Programming
- 2-AP-10 - Use flowcharts and/or pseudocode to address complex problems as algorithms.
- 2-AP-13 - Decompose problems and subproblems into parts to facilitate the design, implementation, and review of programs.
- 2-AP-17 - Systematically test and refine programs using a range of test cases.