Lesson 8: Dance Party
Grades K-2 | Grades 3-5 | Grades 6-8 | Grades 9-12
Overview
In this lesson, learners of all ages get an introductory experience with coding and computer science in a safe, supportive environment. This lesson has been designed for learners of all ages but does require reading. This activity requires sound as the tool was built to respond to music.
Purpose
This lesson introduces the core CS concepts of coding and event programming (using blocks).
Agenda
Getting Started (5 minutes)
Activity (30-45 minutes)
Wrap Up (5 minutes)
Go Viral
Assessment (2 minutes)
Objectives
Students will be able to:
- Develop programs that respond to timed events
- Develop programs that respond to user input
- Create dance animations with code
Preparation
One Week Before Your Hour of Code
- Review the Hour of Code Educator Guide and Best Practices from Successful Educators in order to begin to plan your Hour of Code event.
- Register your Hour of Code event if you’d like to get classroom support, discounted posters, or participate in the robotics give-away (US only).
- Review and complete the online tutorial yourself: Dance Party
- Be sure to test it first before asking your students to complete it. Check your technology and decide if you need to troubleshoot anything in advance of your Hour of Code.
- Review the supplementary lesson plan, "The Big Dance Party" to determine whether or not you'd like to lead this lesson in advance of your Hour of Code.
One Day Before Your Hour of Code
- Each student who completes the activity should receive a certificate. Print one for everyone in advance to make this easier at the end of your Hour of Code.
- (optional) Encourage students to bring in headphones to use during the activity.
Links
For the Teacher
Vocabulary
- code - (v) to write code, or to write instructions for a computer.
- Event - An action that causes something to happen.
- Program - An algorithm that has been coded into something that can be run by a machine.
Support
Report a Bug
Teaching Guide
Getting Started (5 minutes)
Setting the Stage
Welcome students to class and very briefly introduce the day’s activity.
Teaching Tip
If you have time and would like to prepare your students with an unplugged activity, consider delivering "Dance Party: Unplugged" before your Hour of Code event. This brief lesson introduces students to the idea of events triggering different dance moves.
Remarks
Today we're going to do something really creative. What's your favorite way to be creative?
Encourage students to share the ways they express creativity, such as with art, dance, music, writing.
Teaching Tip
One way to introduce the Hour of Code if you are not very familiar with coding yourself is to show one of our inspirational videos. Choose one you think your students will find inspiring, and share it now. For learners in the middle grades, we suggest The Hour of Code is Here.
Explain that today we're going to be creative with "code", which just means means a set of instructions that a computer can understand. Just like choosing which type of colors of paint to use, or what kinds of words you write with can be express creativity, choosing what code you write and how people interact with it can be an opportunity to express your creativity too!
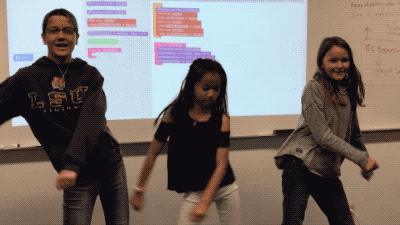
Get up and dance: Announce to the class that today we're going to see how we can combine coding with dancing in a creative way. Ask your kids to floss, dab, or do a creative dance move of their own for 10 seconds to get them in the mood. You can play a song from this Spotify Playlist (all ages) to help kick things off. Capture your class's moves on video.
Activity (30-45 minutes)
Music Filtering
This tutorial features songs from popular artists. To get a preview of the song list in this tutorial, check out this Spotify Playlist. We are using radio-safe versions of all songs and for students under 13, we limit the music to this filtered list Spotify Playlist (all ages). If you would like to use the filtered list with older students, you can share this link with your classroom.
General Support
General Support: As a teacher your role is primarily to support students as they make their way through the tutorial. Here are a few tips that should help students regardless of the level they're working on
- Collaborate with Neighbors: Encourage students to check in with a neighbor when they're getting stuck. Since this tutorial includes videos and students may be wearing headphones it can get easy to "go into a bubble". Help break those barriers by actively pairing students if they seem like they need help. Depending on the age and ability of your students, you might consider formally breaking your class into pairs to complete the tutorial using pair programming.
- Read the Instructions: The instructions usually provide helpful tips on how to complete the level. Before completing a level for a student ensure they've actually looked closely at the target image and read all the text there.
 Stuck? Look for hints: Each level includes a hint with further details about how to pass the level. If students are trying to pass puzzles as quickly as possible, they might find they just need to wait a certain amount of time for all of the code to play out before moving on. Many levels contain a second hint with suggestions of ways to get even more creative by extending the task.
- Move On and Come Back: Sometimes students will benefit more from coming back to a tricky level. All levels are independent of one another, though they do rely to some degree on previously introduced concepts.
- Take your time and experiment. Even though the first couple levels tell students exactly what they need to do to pass, they should also feel free to try out their own ideas.
Level by Level
2019 Tutorial - View on Code Studio
Level 1
- Drag the red
make a newblock from the toolbox on the left to the workspace on the right. Connect it inside thesetupblock. - You have now written your first program. Make sure to press Run to see what happens. You should hear music and see a character start to move in the display area.
Level 2
- Levels 2-3 are about making the dance interactive.
- The green blocks are event blocks. These blocks start a new sequence of code and do not need to be connected inside the
setupblock. - Connecting the purple block under the green event block allows you to make the character perform a dance by pressing the orange arrow buttons or keys on your keyboard.
- Make sure to press the arrow buttons after pressing Run or the dancer(s) won’t move.
Level 3
- Make sure to bring out a second purple
do onceblock. You should have abears do onceblock and acats do onceblock in your workspace. Both should be connected to a greenwhen pressedevent block. - Make sure to press the arrow buttons after pressing Run or the dancers won’t move.
Level 4
- Levels 4-5 are about synchronizing the dance to the music.
- The
after measuresevent blocks also start a new sequence of code and should not be connected inside thesetupblock. - Connecting the purple
do foreverblock under the greenafter measuresevent block should make the character perform a dance move after the number of measures you indicate. - The
do foreverblock works differently from thedo onceblocks seen in the previous levels.
Level 5
- Make sure to bring out a second green event block. You should have a
after 4 measuresblock and aafter 6 measuresblock in your workspace. Both should have purple block connected underneath.
Level 6
- Level 6 is about creating groups of dancers quickly.
- Use the new block provided into the toolbox to create a set of smaller dancers.
*You should also use the normal
make a newblock to create a larger “lead” dancer. - Many students will be familiar with the idea that you can make something seem to be further away by drawing it a smaller scale. In the next level you’ll be able to fine tune this effect.
Level 7
- Levels 7-9 are about adjusting the properties (e.g. size, color) of the dancers.
- It is important to make sure that the teal
setblock is placed somewhere in the program after the dancers have been created. To solve this puzzle, place aset sizeblock anywhere in your program and use it to change the size of some of your dancers. - Dancers created as a group have a default size of 30. Other dancers have a default size of 100.
Level 8
- As with the previous level, make sure to only use the
set tint to (color)block after you have made the dancers in your program. For example, placing it as the first step in thesetuparea of your program will have no effect.
Teaching Tip
By this point in the lesson you may notice that the instructions are less prescriptive. Encourage students to be creative and explore the new blocks that are introduced. From this point on student code is not checked for correctness in order to encourage experimentation instead of solving a specific task.
Level 9
- With the right code, you should see the dancer cycle through different colors, sizes, or dance moves.
- Make sure there is a teal
change, a tealrandomizeblock, or a purpledo foreverblock connected inside theevery 2 measuresblock. - Make sure
do foreverblocks are set to either (Next), (Previous), or (Random). Otherwise, the dancer will just perform the set move repeatedly. - Note that the code students write in this level is not checked for correctness. This means they will always pass the level, even if they do not change the program. Students should feel free to experiment with their code in ways that are interesting to them. Click the “Finish” button to move on.
- Making new dancers inside the
every 2 measuresblock will cause your program to create multiple identical dancers at the same location(s) and may lead to unintended consequences!
Level 10
- This last level is very open-ended. The tutorial itself is designed to give students ample time to keep working on their own dance.
- Encourage Sharing: If students have cell phones with a data plan they can quickly text a link to their projects to their own phone or a friend's. If your school policy allows it, encourage them to do so here.
- Encourage Creativity: Creativity is important throughout this lesson, but this is true here more than anywhere else!
2018 Tutorial - View on Code Studio
Level 1
- Drag the red
make a newblock from the toolbox on the left to the workspace on the right. Connect it inside thesetupblock. - You have now written your first program. Make sure to press Run to see what happens. You should hear music and see a character start to move in the display area.
Level 2
- The green blocks are event blocks. These blocks start a new sequence of code and do not need to be connected inside the
setupblock. - Connecting the purple block under the green event block should make the character perform a dance move after the number of measures you indicate.
Level 3
- Make sure to bring out a second green event block. You should have a
after 4 measuresblock and aafter 6 measuresblock in your workspace. Both should have purple block connected underneath.
Level 4
- Drag out the
set background effectblock. - This block can be connected inside
setup, under an event block, or in both places!
Level 5
- With the right code, you should see the dancer cycle through a different move every 2 measures.
- Make sure there is a purple
do foreverblock connected inside theevery 2 measuresblock. - Make sure the
do foreverblock is set to either (Next), (Previous), or (Random). Otherwise, the dancer will just perform the set move repeatedly.
Level 6
- Be careful to avoid putting the red
make a newblock inside theevery 2 measuresblock. This will cause your program to create multiple identical dancers at the same location.
Level 7
- Many students will be familiar with the idea that you can make something seem to be further away by drawing it a smaller scale. In this level, you'll create this effect by making the two dancers on the ends smaller.
- It is important to make sure that the teal
setblock is placed somewhere in the program after the dancer has been created. To solve this puzzle, place aset backup_dancer2 size to 50block somewhere under themake a new robot called backup_dancer2block.
Level 8
- As with the previous level, make sure to only use the
set tint to (color)block after you have the made the dancer in your program. For example, placing it as the first step in thesetuparea of your program will have no effect.
Level 9
- Computer science allows to process input information into interesting types of output. In this level, students can explore how a dancer's properties can be updated automatically based on the actual sound of the music.
Teaching Tip
By this point in the lesson you may notice that the instructions are less prescriptive. Encourage students to be creative and explore the new blocks that are introduced. From this point on student code is not checked for correctness in order to encourage experimentation instead of solving a specific task.
Level 10-11
- These levels are about making the dance interactive. Try out the new
when pressedevent to make the dancers respond to key presses. - You can use the arrow keys on your computer keyboard or click the orange buttons under the display area.
- Note that the code students write in these levels is not checked for correctness. This means they will always pass the level, even if they do not change the program. Encourage students to determine for themselves whether the code is doing what they expect before moving on.
Level 12
- The top six blocks in this tool box look familiar but all work in a different way. Instead of creating or controlling one dancer, they work with groups of dancers.
- Like the previous levels, code is not checked for correctness here. Students should feel free to experiment with groups in ways that are interesting to them.
Level 13
- This last level is very open-ended. The tutorial itself is designed to give students ample time to keep working on their own dance.
- Encourage Sharing: If students have cell phones with a data plan they can quickly text a link to their projects to their own phone or a friend's. If your school policy allows it, encourage them to do so here.
- Encourage Creativity: Creativity is important throughout this lesson, but this is true here more than anywhere else!
Wrap Up (5 minutes)
Debrief
- Pose a prompt that has multiple answers such as “What is something you enjoyed about today's activity?” or “What is the connection between creativity and computer science?"
Celebrate
Explain that you are spending one hour coding today, because this week is CS Education Week, and millions of other students across the globe have also been learning one Hour of Code this week. Congratulate students on being part of this world wide movement.
Give each student a certificate with his or her name on it.
Next Steps
Let students know that if they enjoyed today’s activity, they have many options for continuing to code. Encourage students to visit code.org/learn for a list of options, or, if you’re planning any of the extension activities that follow, tell students what’s coming next in your classroom.
Go Viral
The Hour of Code is about creativity, and we can’t wait to see what you create! Please share student creations, photos, and videos on social media! Teachers, record your classroom coding a dance, or dancing the dance. Make your video special by adding an ending clip.
Be sure to include #HourOfCode and tag us on Facebook, Twitter and Instagram. Bonus points for tagging the artist whose music your students used. Code.org will re-share our favorite posts to our millions of followers. 🙂
Of course, make sure to respect your school's social media policy.
Assessment (2 minutes)
Ask students to add their “Whip Around” sticky notes or note cards to your "Computer Science" mind map on their way out the door. Try to populate the board with lots of great ideas about what CS is and why it matters.
Student Instructions
Let's have a dance party!
Drag the make a new block into the workspace, and connect it inside the setup block to create your first dancer.
- You can also click the lightbulb to the left if you want more information or extra challenges.
Student Instructions
Let's get this moose dancing!
Drag out the new_dancerFloss-1 block onto the workspace. Connect it underneath the 4"measures" block. Your dancer should start a new move after the fourth measure.
Measures are used to count time in music. In this tutorial, a measure is four beats long.
Student Instructions
Now we're grooving!
Add a 6"measures" block to your workspace. Make the dancer start a new move after 6 measures.
Student Instructions
This dance needs some flash!
Look for a new block in your toolbox that adds a background effect behind your dancer. Watch the effects change in time with the music!
Student Instructions
Use another new block to make the dancer change moves every 2 measures!
- Choosing
(Next),(Previous), or(Random)tells the dancer to perform a different move every time the code is run.
Student Instructions
We need more dancers!
Create a backup dancer called backup_dancer1 to dance with the cat.
Student Instructions
Every dancer has a set of properties that control what it looks like.
You can make it look like a dancer is in the background by making their size smaller. Can you make both backup dancers the same size?
Student Instructions
Dancers have a "tint" property that can add a layer of color. Try changing the tint of one of your dancers. * Tints will mix the color you choose with the colors of the dancer.
Student Instructions
Now we know how to change a dancer's properties. We can also make the same properties automatically respond to the music using this block: right_unicorn "scale" "bass"
This program uses the music's "bass" volume (the low sounds) to control one dancer's height. Can you make the other dancer respond to the music too?
Student Instructions
The block lets you run code when the up arrow is pressed.
You might change the dance move, change a dancer's properties, or do a quick move just once. Be creative and look out for new blocks!
Student Instructions
It's time for a dance-off! The Cat dabs when you press the left arrow key. Make the Robot "drop" once when you press the right arrow key, and "floss" once when you press the up arrow key.
Use the keys to get the Robot to do the drop-floss-drop-floss as fast as you can!
Student Instructions
Check out this block:
6 "DUCK" "circle"
Now you can create a bunch of dancers at once!
Try using some of the "all ducks" blocks to write code that will make all of the ducks dance together.
Student Instructions
Get your groove on! Create a dance of your own to share with your friends.