Lesson 7: Sticker Art with Loops
Overview
Watch student faces light up as they make their own gorgeous designs using a small number of blocks and digital stickers! This lesson builds on the understanding of loops from previous lessons and gives students a chance to be truly creative. This activity is fantastic for producing artifacts for portfolios or parent/teacher conferences.
Purpose
This series highlights the power of loops with creative and personal designs.
Offered as a project-backed sequence, this progression will allow students to build on top of their own work and create amazing artifacts.
Agenda
Warm Up (15 min)
Main Activity (30 min)
Wrap Up (15 min)
View on Code Studio
Objectives
Students will be able to:
- Identify the benefits of using a loop structure instead of manual repetition.
- Differentiate between commands that need to be repeated in loops and commands that should be used on their own.
Preparation
- Play through the lesson to find any potential problem areas for your class.
- Make sure every student has a journal.
Links
Heads Up! Please make a copy of any documents you plan to share with students.
For the Students
- Think Spot Journal - Reflection Journal
Vocabulary
- Loop - The action of doing something over and over again.
- Repeat - To do something again.
Support
Report a Bug
Teaching Guide
Warm Up (15 min)
Introduction
Students should have had plenty of introduction to loops at this point. Based on what you think your class could benefit from, we recommend:
- As a class, playing through a puzzle from the last lesson, "Loops with Rey and BB-8"
- Reviewing how to use Artist by playing through a puzzle from "Programming in Artist"
- Previewing a puzzle from this lesson
All of these options will either review loops or the artist, which will help prepare your class for fun with the online puzzles!
Main Activity (30 min)
Online Puzzes
Some students may discover where to add repeat loops by writing out the program without loops then circling sections of repetitions. If the students in your class seem like they could benefit from this, have them keep paper and pencils beside them at their machines. Students might also enjoy drawing some of the shapes and figures on paper before they program it online. (When drawing stamps, it can be easier to symbolize those with simple shapes like circles and squares.)
Wrap Up (15 min)
Journaling
Having students write about what they learned, why it’s useful, and how they feel about it can help solidify any knowledge they obtained today and build a review sheet for them to look to in the future.
Journal Prompts:
- What was today’s lesson about?
- How did you feel during today’s lesson?
- What was the coolest shape or figure you programmed today? Draw it out!
- What is another shape or figure you would like to program? Can you come up with the code to create it?
Student Instructions
The artist is in the wrong spot!
Use the jump to 200 over 200 down block to get the artist to the center of the play area.
Then draw a line 50 pixels long with the move forward block.
Student Instructions
Now, put this code into a repeat block and loop it 6 times.
- Notice that we have added a 60 degree turn at the end of the looped code to get a full rotation.
Student Instructions
"Fantastic!"
Let's add some style by changing the brush using the set pattern block before our loop starts.
Teaching Tip
This lesson contains a mini-project called Sticker Design. This progression may feel very different from what has come earlier in the course for you as well as your students. These levels have some new characteristics you may want to explore before starting.
- The code your students write in one level will automatically transfer over to the other levels. This allows them to build gradually and iterate on their ideas as they learn.
- These levels are not checked for correctness to allow for more open-ended creativity. Empower your students to determine for themselves when they have completed each task. There is no one right answer!
- Example solutions are available for this step of the progression which can be viewed by opening the teacher panel to the right.
Student Instructions
Free Play: Let's build something bigger, one step at a time!
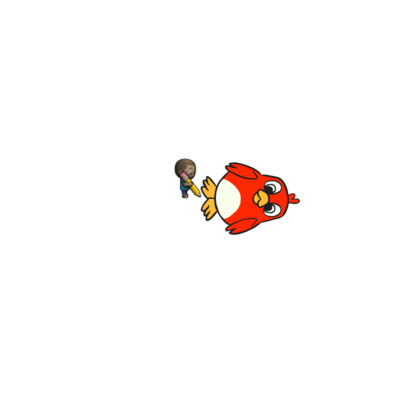
Get the artist to the center of the play area using the jump to the middle center position block, then use the draw sticker block to make something appear.
Press "Finish" when you are happy with what you've made.


Teaching Tip
This lesson contains a mini-project called Sticker Design. This progression may feel very different from what has come earlier in the course for you as well as your students. These levels have some new characteristics you may want to explore before starting.
- The code your students write in one level will automatically transfer over to the other levels. This allows them to build gradually and iterate on their ideas as they learn.
- These levels are not checked for correctness to allow for more open-ended creativity. Empower your students to determine for themselves when they have completed each task. There is no one right answer!
- Example solutions are available for this step of the progression which can be viewed by opening the teacher panel to the right.
Student Instructions
So much fun!
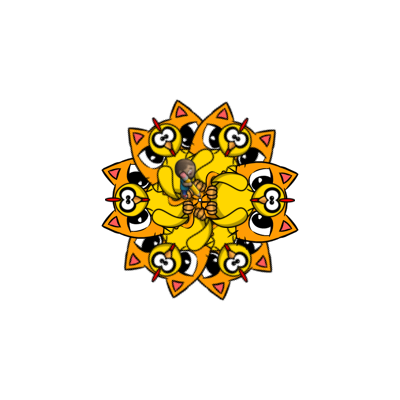
Now, add a second sticker right on top of the first one to make an image like the ones below.
Press "Finish" when you are happy with what you've made.


Teaching Tip
This lesson contains a mini-project called Sticker Design. This progression may feel very different from what has come earlier in the course for you as well as your students. These levels have some new characteristics you may want to explore before starting.
- The code your students write in one level will automatically transfer over to the other levels. This allows them to build gradually and iterate on their ideas as they learn.
- These levels are not checked for correctness to allow for more open-ended creativity. Empower your students to determine for themselves when they have completed each task. There is no one right answer!
- Example solutions are available for this step of the progression which can be viewed by opening the teacher panel to the right.
Student Instructions
Edit your code so that you jump forward between drawing the two stickers. In this puzzle, make sure you have jump to the middle center position inside of your loop, so you stay in the center!
Press "Finish" when you are happy with what you've made.


Student Instructions
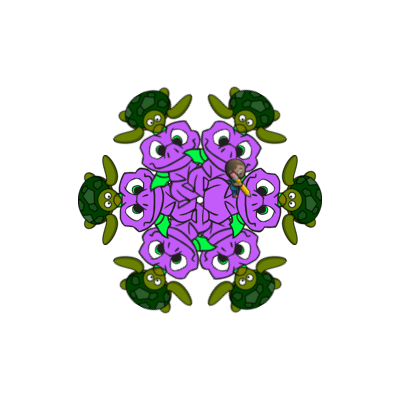
What happens when you replace one or both of the stickers with a different creature?

Teaching Tip
This lesson contains a mini-project called Sticker Design. This progression may feel very different from what has come earlier in the course for you as well as your students. These levels have some new characteristics you may want to explore before starting.
- The code your students write in one level will automatically transfer over to the other levels. This allows them to build gradually and iterate on their ideas as they learn.
- These levels are not checked for correctness to allow for more open-ended creativity. Empower your students to determine for themselves when they have completed each task. There is no one right answer!
- Example solutions are available for this step of the progression which can be viewed by opening the teacher panel to the right.
Student Instructions
What happens when you move forward then move backward by 100, 200, or 400 pixels somewhere inside the loop?
- Try using the set pattern block before you start your loop to make a work of art!


Teaching Tip
This lesson contains a mini-project called Sticker Design. This progression may feel very different from what has come earlier in the course for you as well as your students. These levels have some new characteristics you may want to explore before starting.
- The code your students write in one level will automatically transfer over to the other levels. This allows them to build gradually and iterate on their ideas as they learn.
- These levels are not checked for correctness to allow for more open-ended creativity. Empower your students to determine for themselves when they have completed each task. There is no one right answer!
- Example solutions are available for this step of the progression which can be viewed by opening the teacher panel to the right.
Student Instructions
Add a third sticker anywhere in the loop that you want! What does it look like now? - Change the pattern on your brush for more variety!


Teaching Tip
This lesson contains a mini-project called Sticker Design. This progression may feel very different from what has come earlier in the course for you as well as your students. These levels have some new characteristics you may want to explore before starting.
- The code your students write in one level will automatically transfer over to the other levels. This allows them to build gradually and iterate on their ideas as they learn.
- These levels are not checked for correctness to allow for more open-ended creativity. Empower your students to determine for themselves when they have completed each task. There is no one right answer!
- Example solutions are available for this step of the progression which can be viewed by opening the teacher panel to the right.
Student Instructions
Try changing the repeat loop to run a different number of times. How far do you have to turn to go around in a full circle?
- Try changing how many times you spin
- Try a 60 degree turn for 6 times around
- Try a 20 degree turn for 18 times around
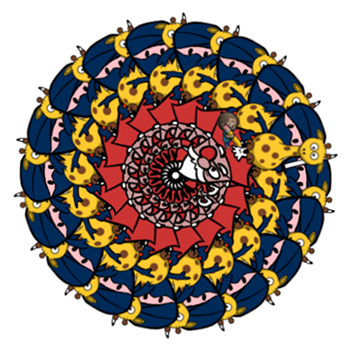
The first image uses a pirate, a ninja, and a giraffe. They loop 18 times with a 20 degree turn.


Teaching Tip
This level is a “free play”. These levels have some characteristics you may want to explore before starting.
- These levels are not checked for correctness to allow for more open-ended creativity. Empower your students to determine for themselves when they have created something they like. There is no one right answer!
- Example solutions are available for this level which can be viewed by opening the teacher panel to the right.
Student Instructions
Now make something on your own. What happens when you make two separate circles of different stickers?
Need an idea? Try making a design like this one.

Standards Alignment
View full course alignment
CSTA K-12 Computer Science Standards (2017)
AP - Algorithms & Programming
- 1A-AP-09 - Model the way programs store and manipulate data by using numbers or other symbols to represent information.
- 1A-AP-10 - Develop programs with sequences and simple loops, to express ideas or address a problem.
- 1A-AP-11 - Decompose (break down) the steps needed to solve a problem into a precise sequence of instructions.
- 1A-AP-14 - Debug (identify and fix) errors in an algorithm or program that includes sequences and simple loops.


