Lesson 14: Project - Interactive Card
Overview
In this cumulative project for Chapter 1, students plan for and develop an interactive greeting card using all of the programming techniques they've learned to this point.
Purpose
This end of chapter assessment is a good place for students to bring together all the pieces they have learned (drawing, variables, sprites, images, conditionals, user input) in one place. Students should still be working with code that is easily readable and doesn't involve a whole lot of magic. Giving students the opportunity to really be creative after learning all these new concepts will help to engage them further as we head into chapter 2.
Agenda
Warm Up (10 min)
Activity (2 days)
Wrap Up (10 minutes)
Assessment
View on Code Studio
Objectives
Students will be able to:
- Use conditionals to react to keyboard input or changes in variables / properties
- Sequence commands to draw in the proper order
- Apply an iterator pattern to variables or properties in a loop
Preparation
- Read the Forum
- Print out a copy of the Interactive Card - Project Guide Activity Guide for each student
Links
Heads Up! Please make a copy of any documents you plan to share with students.
For the Teachers
- Interactive Card - Project Guide Exemplar
- Interactive Card - Peer Review Exemplar
For the Students
- Interactive Card - Rubric
- Interactive Card - Project Guide
- Interactive Card - Peer Review
Teaching Guide
Warm Up (10 min)
Demo Project Exemplars (Level 2)
Goal: Students see an example of a final project and discuss the different elements that went into making it.
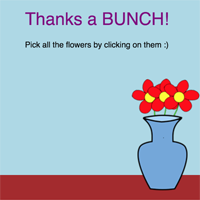
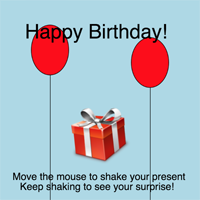
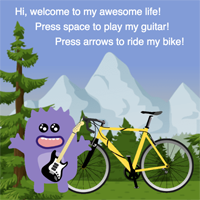
Display: On the projector, run the exemplar for students. Since this is on level 2 of the progression, if its easier for students to do it on their own computers you could do that as well.
Discuss: Have students share their observations and analyses of the exemplar.
Encourage the class to consider that there are multiple approaches to programming anything, but that there may be clues as to how something was created. In particular, when they are sharing their thoughts ask them to specify the following :
- Clues that suggest a Sprite was used
- Clues that suggest a conditional was used
- Clues that suggest an iterator pattern was used
Display: Show students the Interactive Card - Rubric rubric. Review the different components of the rubric with them to make sure they understand the components of the project.
Activity (2 days)
Unplugged: Interactive Card Planning
Goal: Students should plan out what they want to create before they head to the computer so that once they get to the computer they are just executing the plan.
Distribute: Hand out the Interactive Card - Project Guide to students. This is the tool students will use to scope out their projects before getting onto the computers. Give students some time to brainstorm the type of card they want to create and who the recipient will be.
Steps
1) The first layer of the interactive card is a background drawn with just the commands in the Drawing drawer. The front of the Activity Guide provides a grid for students to lay out their background, a reference table of drawing commands, and an area for students to take notes and write pseudocode.
2) Next students think through the Sprites they'll need, filling out a table of each Sprite's label, images, and properties
3) Finally students consider the conditionals they'll need in order to make their card interactive.
Levels: Implementing Interactive Card (Level 3 - 7)
Transition: Once students have completed their planning sheet, it's time to head to the Code.org website for Lesson 10. The short level sequence asks students to complete each element of their project.
Peer Review
Distribute: Give each student a copy of Interactive Card - Peer Review.
Students should spend 15 minutes reviewing the other student's card and filling out the peer review guide.
Iterate - Update Code
Circulate: Students should complete the peer review guide's back side and decide how to respond to the feedback they were given. They should then use that feedback to improve their cards.
Reflect
Using the Interactive Card - Rubric, students should assess their own project before submitting it.
Send students to Code Studio to complete their reflection on their attitudes toward computer science. Although their answers are anonymous, the aggregated data will be available to you once at least five students have completed the survey.
Wrap Up (10 minutes)
Sharing Cards
Goal: Students share their creations with the class.
Share: Find a way for students to share their cards with each other, and with the intended recipient. It will likely be helpful to use the share link for the project so that students can share the project with other students.
Assessment
A rubric for assessing student projects is provided in the resources.
- Lesson Overview
- Teacher Overview
- Student Overview
- Interactive Card - Project Guide Exemplar(PDF | DOCX)
- Interactive Card - Peer Review Exemplar (PDF | DOCX)
- Interactive Card
- Student Overview
Example Project
Run the program a few times and answer the following questions:
1) Which elements appear to use drawing commands?
2) Which elements appear to be Sprites?
3) For each Sprite, which properties are being updated?
4) Where do you see conditionals being used?
5) Are there elements that you don’t understand?
- Making an Interactive Card
- Student Overview
Student Instructions
Laying Out Your Background
Before beginning this project, you should have already completed the Interactive Card Planning activity, and you'll want to have that paper with you as you develop your program. Preparation is one of the most important elements of successfully creating a program!
Do This
Refer to your planning activity sheet to help you lay out the shapes that will become the background to your card.
- First, figure out what the lowest layer in your image is (this should use the
background()block) and add it to the very top of the draw loop. - Next, layer each additional drawing block in the order you want them to appear in the stack.
- Finally, add a comment to the top of this section of code to describe what it does, and if you have any particularly complicated chunks of code within (such as code to draw a tree or a house), add a descriptive comment to that as well.
Challenge: Can you use variables or randomNumber() to add some subtle animation to your background layer?
Student Instructions
Adding Sprites
Now that you have the more static elements of your card layed out, it's time to add the Sprites. Your Sprites should provide the primary animations and interactions for your card - so feel free to get creative here and have fun.
Do This
Check out the Sprites table on the back of your planning sheet. For each Sprite in your table:
- Initialize the Sprite at the top of your program with
createSprite(). - Find or create the image(s) for the Sprite and set it with
setAnimation(). - Inside the
draw()loop update any Sprite properties that we will be constantly animating (we'll deal with conditionals in a minute).
Student Instructions
User Input
You've got a background, you've got Sprites, now it's time to give your user something to do!
Do This
On the interactions table from your planning sheet, find all of the interactions that rely on user input (key presses and mouse movements). For each of those interactions:
- Add an
ifblock (orif-elseblock if you need a fallback action) inside thedraw()loop. - Add the appropriate input block for your condition (such as
keyDown()ormouseDown()). - Add the necessary actions inside the
ifblock.
Challenge: Can you create more sophisticated conditionals by nesting them or using compound booleans?
Student Instructions
Other Conditionals
The surprise in your card comes from conditionals that don't directly respond to user input, but to some other element of your card. This could be triggered by a variable that gets updated as the user interacts with your card, or a Sprite moving into a certain part of the screen.
Do This
For each of the remaining items on your interactions table:
- Add an
ifblock (orif-elseblock if you need a fallback action) inside the draw loop. - Add the appropriate Boolean comparison block to the condition (eg.
<,>, or==). - Add the necessary actions inside the
ifblock.
Challenge: Can you create more sophisticated conditionals by nesting them or using compound booleans?
Student Instructions
Finishing Touches
Now's your chance to put some finishing touches on your card. We've included some new blocks that you haven't seen before, so take some time to look around and try out some new blocks.
Do This
Consider adding any of the following to finish up your card:
- Text
- Additional images for your sprites
- Subtle animation in the background
- Sound effects (Can you figure out now to do this?)
- More ways for a user to interact with your card
- Reflection
- 9
Student Instructions
This level is an assessment or survey with multiple questions. To view this level click the "View on Code Studio" link.
Standards Alignment
View full course alignment
CSTA K-12 Computer Science Standards (2017)
AP - Algorithms & Programming
- 2-AP-11 - Create clearly named variables that represent different data types and perform operations on their values.
- 2-AP-12 - Design and iteratively develop programs that combine control structures, including nested loops and compound conditionals.
- 2-AP-13 - Decompose problems and subproblems into parts to facilitate the design, implementation, and review of programs.
- 2-AP-15 - Seek and incorporate feedback from team members and users to refine a solution that meets user needs.
- 2-AP-16 - Incorporate existing code, media, and libraries into original programs, and give attribution.
- 2-AP-17 - Systematically test and refine programs using a range of test cases.
- 2-AP-18 - Distribute tasks and maintain a project timeline when collaboratively developing computational artifacts.
- 2-AP-19 - Document programs in order to make them easier to follow, test, and debug.


